A couple of weekends ago I ran my first game of Dragonbane from Free League. It was with my 9 year-old daughter and her two friends (girl power was the rallying cry!), and they were all beginners. They laughed, they rolled dice, they bit their nails in anxiety, they cheered and they shouted in glee with crit and flying decapitated head at just the right moment.
All in all, the game was a great success, and I can recommend the rules that are simpler than D&D but still provides the vanilla fantasy game experience. We will play again.
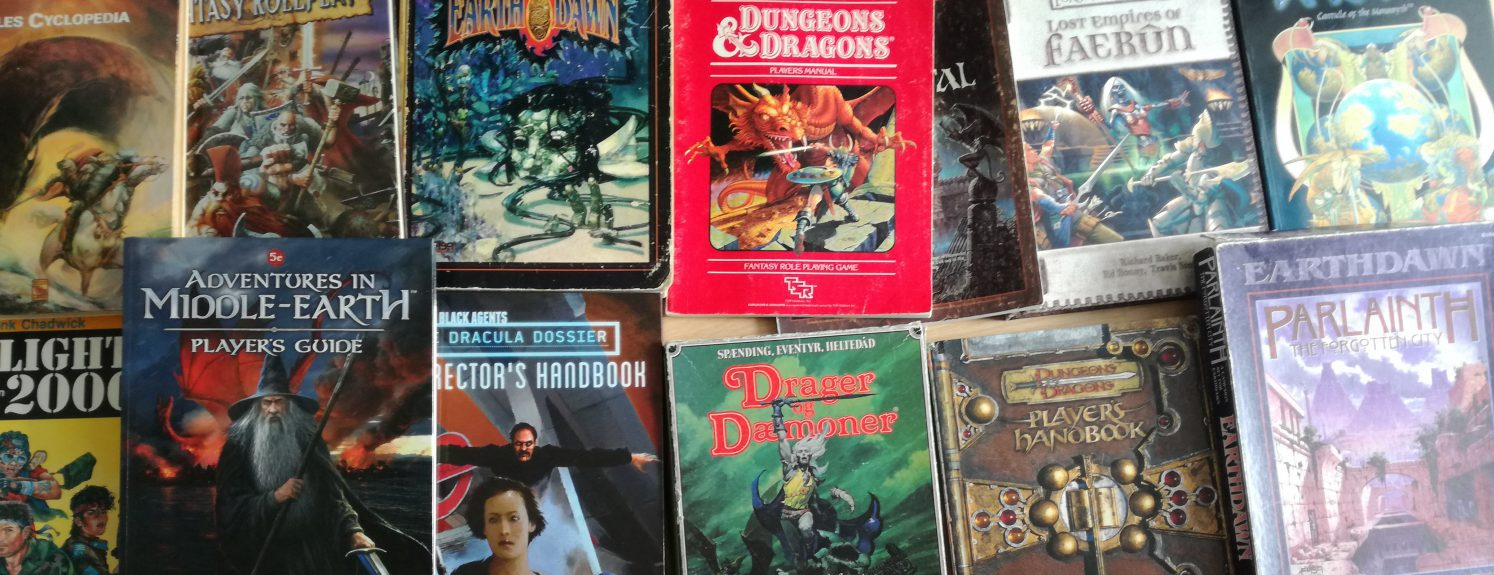
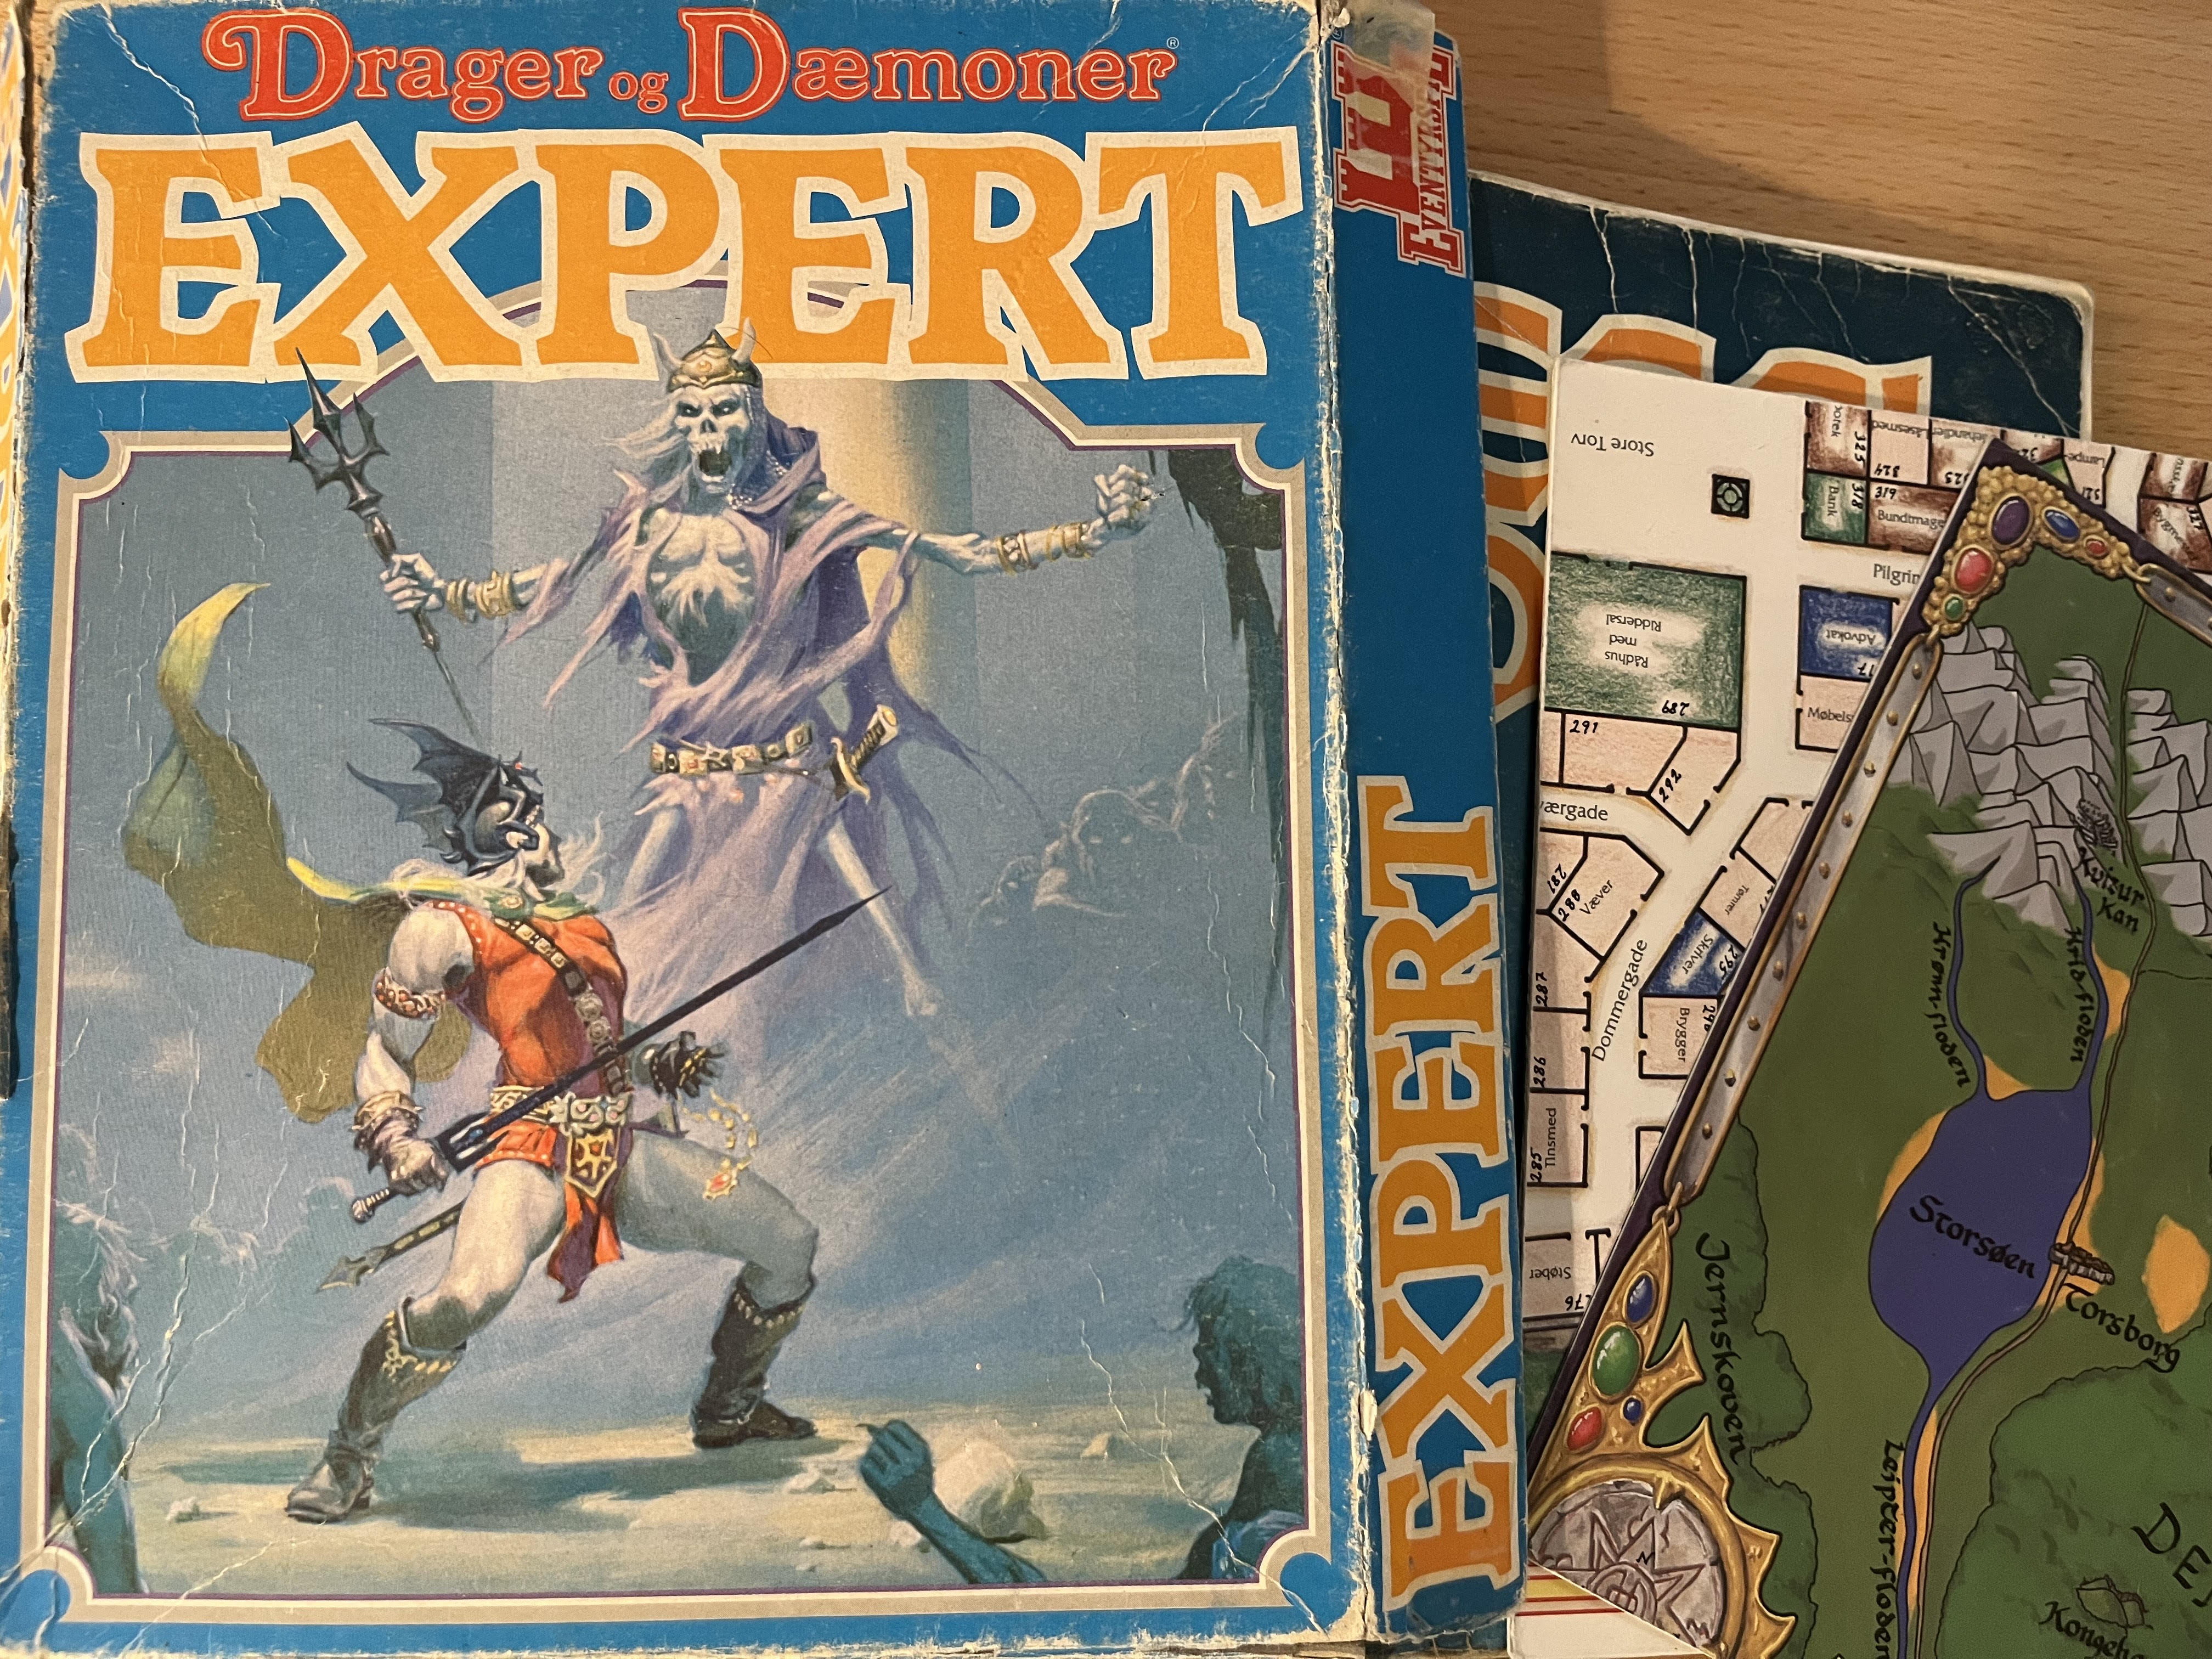
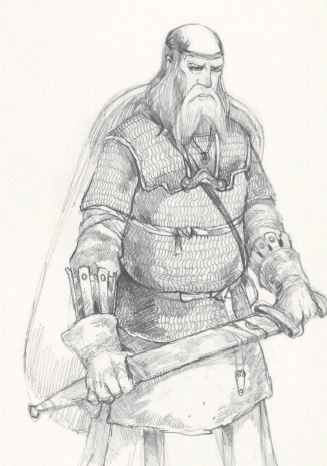
We played in our native language, Danish, and the Dragon Bane rules have been translated (to Drager & Dæmoner which means Dragons & Demons in Danish). It is a sweet bonus that Dragon Bane is a revision of the ‘expert’ rules I played myself 37 years ago (see photo). I’m very pleased that the Danish publisher will continue to translate the future supplements.
This will not be a full review of the game. Instead, I will highlight a few things that made it particularly good for beginners, and a some other observations, also on GM’ing for kids.
My well-used original Dragonbane game from 1989, published by Eventyrspil.
*Because I own the Danish rules, the term I use may differ from the actual game set.
Why is Dragon Bane good for beginners?
To accomplish anything, you simply roll a D20 equal or under your attribute or skill. It is simpler than roll a d20 and add something, plus maybe another thing, to achieve a number you don’t know.
Skills are less abstract. If you want to hit someone with your sword, find the sword skill. Oh, you want to sneak up on someone, find the sneak skill… Easy.
Armor reduces damage. It is simply more intuitive. Always has been.
Character sheets in their native language was one of the reasons why I picked this game – that would also go for Swedish, or Polish etc.
Characters are fairly competent from the start. A character will typically have 60-70% chance of succeeding at skills they are competent in. That is higher than most games. And there is a ‘push mechanic’ which makes it even more likely.
What did I do to make it work for young kids?
I made characters in advance. I asked my daughters about what types she thought were interesting and made those. I made 4 for 3 players, so there were choices to make. But a narrow set.
We picked a character (and a mini), I also gave them 10-15 lines of ‘backstory’, which also gave them some sense of what they were good at.
Then I explained the dice, how skills worked and kicked off the game to get started quickly.
We had two 45-60 minutes breaks for lunch and LEGO. That was super important.
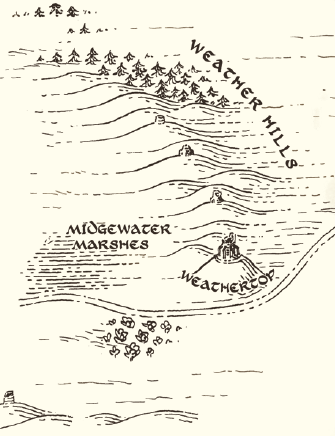
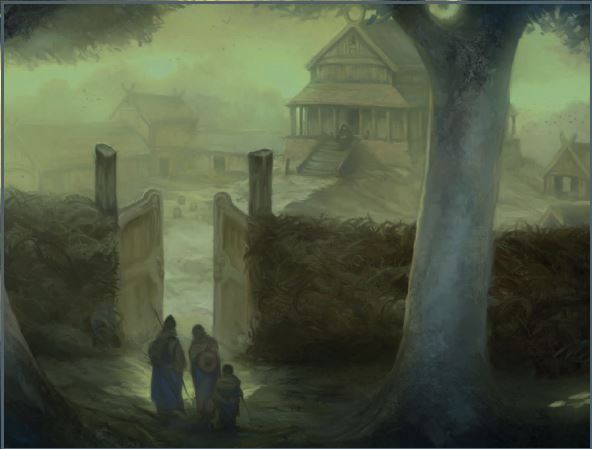
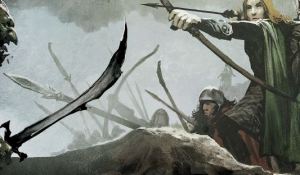
Delian Tomb for Dragonbane
They ended up playing human fighter, elf animist (a wizard, but feels like a druid in D&D), and a halfling treasure hunter (thief).
For the game, I ran Matt Coleville’s Delian Tomb, which is free online in its original version (they have made a new, more expansive version, for their cool and interesting Draw Steel RPG). I modified it so they met a faerie in the woods, who could show them the way (and provide a social encounter), I placed the tomb in the middle of a small marsh, and I cut the patrol.
We got through the whole adventure in 3 hours – excluding breaks. It was great fun, and the girls loved rescuing a boy!
System Changes I made
I only introduced the more complex aspects of the game as they were needed, like heroic abilities and armor, and ignored things like weapons taking damage or breaking.
I don’t want to have a fumble in combat on a natural 20. A 5% chance is very high, and with only 3 players, the consequences of a serious fumble can be devastating. A miss is harsh enough. They are fun though! The girls loved it, when it happened to a goblin… I might introduce a ‘confirmation roll’ so if they fumble, they need to test the skill again, and on a failure it is a fumble.
Other thoughts about Dragonbane
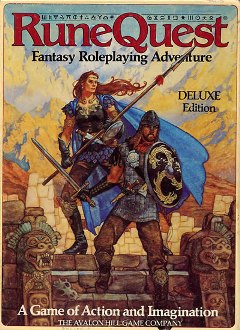
This version of RuneQuest was my first, but never got the opportunity to play it.
The original Dragonbane game from 1985 was based on RuneQuest (argueably an 80% copy). But whereas today RuneQuest remains quite a complex game (but deep and beautiful), Dragonbane has been modernized and simplified. There are no hit locations, for example, which it had in its original version.
The push mechanic is excellent – and used in most Free League games. To use it, you need to pick a ‘condition’, such as angry or scared, which both carries a mechanical penalty and is evocative for role-playing – also for kids.
The rules are super easy to read
It seems quite lethal, where characters typically have 10-15 hit points, but weapons easily do 2d8+d4 damage…
The campaign for the box set is big and solid and very playable
If you want to check out other Free League games – they are really good! – I’ve written a guide to most of them.
This article could also be called: Why should I try The One Ring RPG? But I picked this title, because there are 50 million D&D players and many have never tried another roleplaying game. Many would like to, but which one to pick? I think there are many arguments for why The One Ring RPG should be a top option.
This article is also a review, but it is NOT a comparison as to which game is best. I love D&D, but the One Ring does things differently – and sometimes better – than the most popular RPG in the world. I have used D&D 5e as context for The One Ring’s mechanics, because that helps explain them to a large audience.
Reading this article, I hope that you get a taste for this game, or get inspired by the mechanics, whether you are a D&D player or not!
In short, I think the One Ring 2nd edition is an excellent fantasy RPG and a great pick for D&D players who want to try something new, yet familiar. The game will appeal to a lot of fantasy lovers, and I think it can be a great way to introduce new people to roleplaying games. The game is designed by Francesco Nepitello and Marco Maggi, and now published by Free League Publishing (Mörk Borg, the Alien RPG, Tales from the Loop, Vaesen and many other award winning, great games).
The rules are fairly simple and the setting is familiar to anyone interested in fantasy. Furthermore, the game system facilitates characters and stories that fit the world and captures the mood of Middle-earth perfectly. The artwork is amazing and the writing oozes of the designers’s love for Tolkien’s world.
This game lets you step right into the Prancing Pony, smell the pipeweed, hear the songs and meet an intimidating Ranger. Or perhaps you cross the cold Misty Mountains as a homesick hobbit alongside a couple of doughty Durin’s Folk to recover lost treasure while being hunted by orcs of Angmar? I could go on but you get it!
Below, I’ve listed some of the things that the One Ring does well, and less well, for quick reference.
There are two major reasons, why the two games are very different: their design history and being generic versus focused on one setting.
The original D&D was a system cobbled together as they invented it – and expanded upon it gradually – ending up with a hodgepodge of mechanics. More than 30 years later, the designers of D&D 5th edition created a game that is faithful to the first editions of the game, but fairly modern in design, with a very robust and fun tactical combat system.
I have not played the One Ring 1ed, so I can’t compare it to that. I can compare it to Adventures in Middle-earth, which was the D&D 5e edition conversion of The One Ring 1st ed. I have written several articles about it. It was not without flaws, but if you really want to stick to 5e rules that game is an option for you. As the books are out of print, they have become fairly pricey, though.
D&D is also a fairly generic fantasy roleplaying game which can be used to create many types of heroic fantasy games, and is easy to homebrew monsters, magic and worlds for, which is a big advantage. It can also be used for gothic horror, low magic fantasy etc., but isn’t really tailored for it.
The One Ring is different. It is a consistent modern system that focuses on creating a very particular game experience. The rules are interlinked to enhance the game’s particular focus, mood, tone and themes. After the bullet points below, I will go through the major parts of the core rulebook and provide insight into how the new edition of The One Ring works – using D&D to provide context. Players who aren’t D&D fans will still get a solid understanding of the game. If you are used to many different games, many of the mechanics will be familiar to you.
First, a quick summary.
What does The One Ring 2ed do well?:
Low magic, high fantasy
Mood, atmosphere and epic adventures (with a taste of sorrow and futility)
Provides a perfect “Middle-earth experience”
Character development in the hands of the players
Travel and exploration
Combat and logistics at a more narrative level
What does The One Ring do less well?:
Tactical combat on a grid
Hackability – this is not meant to be a generic system, but is tied closely to the source material
Long dungeon crawls and hack & slash
The One Ring (2ed) is probably for you if:
You want to adventure in Middle-earth
You want to try a low-magic fantasy RPG
You want a fantasy RPG with more focus on narrative and less focus on tactical combat
You want to try an RPG with interesting mechanics that support the core aspects of the game
The One Ring (2ed) is probably NOT for you if:
You don’t like the Middle-earth setting
You prefer high magic games, with lots of flashy spells, magic loot and big BOOMS!
You just want to relax bashing monsters and looting their stuff (I love that too, sometimes)
You prefer games with extensive character customization options
That was the short version. Do you want to know more? Then, read on dear guest.
Where and when does the game take place?
The default game is set between the events of the Hobbit and the Lord of the Rings in the Eriador region, where you find places like Hobbiton, Bree, the Old Forest, three petrified trolls, the Barrow Downs and many other locations known from the source material. It also contains a number of locations not featured prominently in the Lord of the Rings or the Hobbit, such as Fornost and Tharbad.
More specifically, the game is meant to begin around 2965. This takes the setting forward from the 1st edition (and Adventures in Middle Earth) which begins around 2947, and shifts the geographical focus away from Wilderland – the region beyond the Misty Mountains with Mirkwood and the Lonely Mountain. At least for now.
That said, you can use the rules to play in any area of Middle-earth, and even shift the time to the Second Age or the Fourth, if you find that suits your purpose. Sourcebooks for many of the well known regions came out for the previous edition of the game. Furthermore, you can pick up sourcebooks for Middle-Earth Role Playing, which came out in the early 80’s.
Core system
The system in The One Ring is very player-facing.
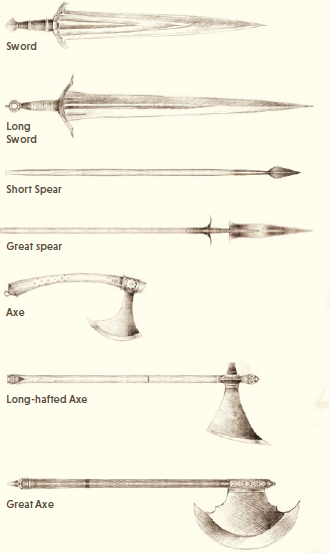
Characters in The One Ring have three attributes: strength, heart and wits. They range from 2-7 – rarely 8. For each attribute there are six associated skills. As strength covers everything physical, from keen eyes to a great singing voice, skills associated with strength include things like Awe, Athletics and Awareness. Heart covers skills like the Travel, Insight and Courtesy while Wits has skills like Lore, Riddle and Persuade. Combat skills are separated and there are only four: axes, spears, swords and bows. Ranks in skills go from 1-6, but beginning characters typically have ranks from 0-3.
The game uses a dice pool system to resolve actions. Players roll one or more dice and if the total added together reaches the target number, you succeed at your task. The player rolls one Feat Dice (D12) and any success dice (D6) they get – which usually comes from your skills or combat abilities – or two D12 and take the highest/lowest if the character has advantage/disadvantage, which is called ‘favoured/illfavoured’ in this game.
EXAMPLE: Let’s say the Hobbit Mirabella tries to sneak past an orc guard. She has three ranks in Stealth, so you roll 3D6, but the player has picked Stealth to be a favoured skill, so she rolls 2d12, picks the highest and adds the result of the 3D6. Does she succeed? In The One Ring, the Target Number isn’t decided by the game master, it is player-facing. As a player, your target number is derived from your own character. If you try a Wits skill, you roll against 20 minus your wits. As Stealth is a wits skill, Mirabella with Wits 5, would need to roll a total of 15 to sneak past the orc. Certain conditions may make rolls harder or easier, of course, usually by adding or subtracting success dice.
However, the dice have some additional features. In the accompanying dice set, the 12 on the D12 is marked with the G rune and if you roll a 12 your action always succeeds. The 11 on the D12 is the Eye of Sauron and counts as zero – or worse depending on circumstances. On the D6, sixes gives you a superior success, and you can convert sixes to bonuses in the game, such as doing a task silently, more damage or cancel a failure for another character. You can use normal D12s or D6s to play, or get the special dice for the game.
On the surface, the core system of The One Ring is more complex than rolling 1D20 and adding a number. But in play, The One Ring doesn’t have dozens of complex special abilities and hundreds of – cool – but complex – spells. Looking at the sum of its parts, the One Ring will be simpler for the vast majority of players.
The gameplay has a structure divided into an Adventuring Phase, where the Loremaster (DM/GM) has primary control, and a Fellowship Phase, where the players have primary control. You could say it is the ‘play’ and ‘downtime’ phases. Unlike D&D however, the One Ring has different rule structures for three important aspects of the adventuring phase: combat, journeys and councils. Further, there are concrete rules for their downtime, which fits the setting and interacts with the recovery of the characters, advancement of the characters and further exploration of the setting.
Below, I will try to describe – as briefly as I can – how the different parts work, and what makes them cool.
Characters
The characters you can play are explicitly heroes. However, they can be lost to The Shadow through greed, pride, wrath and a few other things.
Cultures and Callings The character’s abilities are mainly defined by their Culture, not by their “class” which is named Callings. Examples of Cultures include: Men of Bree, Hobbit of the Shire, Elf of Lindon and Dunedaín.
When you create your character, each Culture has six different distributions of attributes you can pick from (or roll a random distribution). How these are distributed depends on the Culture, but all of them contain 21 attribute points, so they are equal, but different. For example, Men of Bree get a maximum of 4 in Strength whereas Dwarves of Durin’s Folk get 7, but max 4 in Heart.
On top of the three primary stats (strength, heart and wits), you also calculate three derived stats: endurance, hope and parry.
This distribution are for Durin’s Folk – meaning dwarves.
Endurance is basically your hit points (but more interesting, so I will get back to that). Hope you can spend to get bonus D6s and Parry is the target number for monsters to hit you – ie your armour class.
These three derived stats differ from Culture to Culture. Bardings have an Endurance score of their strength +20, but Hobbits only get +18.
Finally, each Culture comes with a couple of special bonuses called Cultural Blessings. For example the Dunedaín gets: Kings of Men, and receives a bonus attribute point.
After picking Culture, you select your Calling. The calling is what motivates the character to go on adventures. The six callings are: Captain, Champion, Messenger, Scholar, Treasure Hunter and Warden. The mechanical effects are slight, but they define their Shadow Weakness, such as Lure of Secrets and Path of Despair (more on that later).
Virtues, Rewards and Gear The One Ring operates with equipment and treasure at a higher level of abstraction than most fantasy RPGs, such as D&D. All characters are expected to have normal travelling gear, but are allowed a number of “useful items”, depending on their culture’s prosperity level. These items can help the character using a particular skill under certain circumstances, such as a great pipe or a liquor to infuse strength. Characters also start with the weapons and armour they desire, again based on their prosperity. The abstraction also applies to treasure which isn’t counted in an exact number of coins, but Treasure Rating. When you gather a specific amount of treasure, your prosperity rating goes up.
At the beginning of the game each character gets one general Virtue and one Reward. As the character gains experience they can gain more virtues and rewards. Virtues are akin to Feats in D&D 5e. and includes general abilities such as Dourhanded and Prowess, and virtues tied to your culture, which you can’t begin the game with but must buy with experience, such as: Dragon Slayer, Elbereth Gilthoniel! and Brave at a Pinch. Rewards are special gear with a mechanical advantage, typically weapons or armor you have earned, such as a Keen sword or Cunningly Made mail shirt.
Derived stats
I want to mention the three derived stats in a bit greater detail, because, particularly Endurance, is a very interesting mechanic.
Your parry rating is the value which adversaries must roll to hit your character. Enemies don’t have a parry rating though. Instead, players roll against their character’s Strength target number, to see if they hit modified by the adversary’s parry rating – normally 0-3. Shields and other factors can add to a character’s parry rating, whereas armor helps you avoid Wounds.
Hope are points players can use to fuel certain abilities (sometimes to make a success ‘magical’) and to add additional D6’s to their rolls. Characters don’t recover Hope that easily, so they should be spent wisely.
Endurance is like Hit Points, and you can lose them from attacks or simply from events on your journey. When you reach zero you drop unconscious. But it is also related to your encumbrance rating (which is called Load in The One Ring). So, when you don gear or armor or carry treasure, you add Load, and when your endurance rating drops below your Load score, the character becomes Weary, which is bad because all rolls of 1,2 and 3 on the D6 then counts as zero.
The mechanical effect of this is that players must weigh carefully the benefit of more armor, shields, weapons etc. versus their ability to fight after a long journey or last through multiple encounters. In D&D, and many other games, more armor is almost always better, but that is not the case in The One Ring. The core mechanic is further supported by the explicit action of dropping your shield or helmet, to decrease your Load during combat, and the explicit rules for pack animals (if your prosperity rating is high enough) or you can bury the treasure you found, because each point of treasure counts as one Load point.
The Endurance mechanic beautifully creates interesting choices for the players AND it means that the fiction of the game will emulate the source material, where few characters wear armor and treasure is buried for later or left behind. I really dig that!
I am a bit baffled, however, that it seems like a strong starting character with 26 in Endurance, who wears a mail coat, helmet, spear and great shield is left with only 1 point of Endurance. That figure can be mitigated with Virtues and Rewards, but still. It might work mechanically for player characters, but it seems like the heavily armoure bands of Bardings or Gondor aren’t viable (dwarves halve the Load, so they are).
The Shadow
The concept of Shadow in the game affects both the characters and the adventure, so I’ll deal with it here at a high level.
There is one overall foe in the game and that is obviously Sauron and all his servants. In The One Ring, player characters are heroes and explicitly adversaries of Sauron.
In the game, there also is a very clear dichotomy between Servant’s of the Enemy, which are irredeemably Evil, and other foes like regular robbers, haughty elven guards or Dunland raiders, which are not.
I very much subscribe to the views that Matt Coleville lays out in the video “Everyone Loves Zombies”, basically saying that players sometimes need to face foes they can unambiguously fight and slay without feeling bad about it, and sometimes they should face foes where there are moral complexities. I am therefore very happy with how explicit this is done in the One Ring, and the support it has from the game system.
The mechanic to support this for characters is called Shadow points. Characters will gain Shadow points when they indulge in their darkest desires or from the fear and despair which the Enemy can induce. Players can roll to resist gaining points of course. Simple Greed, whenever the characters discover treasure, can result in Shadow points and they can gain them from Misdeeds: actions that are unheroic, such as stealing, threatening with violence or ending the life of a foe who isn’t evil. Further, dark sorcery can cause shadow point “damage”.
The result of accumulating shadow points is a descent along your character’s Shadow Path and into madness, and ultimately the end of the character as a PC. Whenever a character’s Shadow points reach the level of their Hope they have a Bout of Madness – a loss of control to their worst inclinations, like Boromir trying to take the ring or Thorin being overcome by greed for a while. This takes the character one step down their Shadow Path. A character’s Shadow Path is determined by his calling, and they have evocative names like Dragon Sickness (greed) and Lure of Power. Each path has four stages of character flaws – roleplaying traits for the character. As an example, Lure of Power goes from resentful to tyrannical.
Mechanically, it has more features than this and ties into the down-time phase for example, but this covers the basics.
There is also a group-level mechanic. When more experienced heroes work against Sauron, it is possible that the enemy will respond. This is governed by the Eye of Sauron mechanic, which is a meter that slowly fills during an adventure when the heroes use magic or gain shadow points. When it reaches a certain point – depending on a number of factors – it has a negative narrative impact on the characters. It could be a direct attack on them, or perhaps the quarry they chase gets away or someone they thought an ally becomes an enemy.
I will need to play a longer game to really judge how the shadow points mechanic works in practice. In Adventures in Middle-earth (the 5e version of the game) the accumulation of shadow points seemed too slow to have a big impact, but it seems to be a bigger factor in this edition.
Adventuring
The adventuring phase has three major mechanical components, but in practice works like any other RPG with an adventure composed of various scenes or with the group exploring a location, like a dungeon.
Combat Combat in The One Ring has been designed for play without miniatures, but using minis or drawing on a mat or screen can still be helpful.
When combat begins, there is usually first an opportunity for both sides to use missile fire before the melee begins.
Subsequently, during the melee, each character selects one of four stances: forward, open, defensive and rearward. The stance you pick also determines the order in which you act and gives access to particular actions, such as intimidate foes or rally comrades. Only the rearward enables characters to use ranged weapons, and it can be restricted, depending on how many enemies there are compared to the characters. The enemies are then distributed between the different PCs.
I will not go into great detail on the mechanics, but there are some interesting features: Players can decide to halve the endurance damage they receive by deciding to get knocked back (an fall prone), and rolling sixes enables special bonuses/effects, depending on which type of weapon you use.
Endurance represents grit and the slow grinding down of your ability to defend yourself, where the final blow knocks you out of the fight – just like hit points in D&D. BUT! in The One Ring you can also get Wounded (similar to the Major Wound mechanic in Call of Cthulhu 7ed). Rolling 10 or 12 on the D12 causes a piercing blow (some effects can modify this) which can cause a Wound. Characters now roll a Protection roll – 1D12 and add the D6s they get from their armor. To avoid the Wound they must roll equal or higher than the Injury Rating of the weapon they were hurt by.
Only by getting Wounded can your character die. At the first Wound there is a 1 in 12 chance that you go down and is dying. A second wound always causes the character to drop and become “dying” and only a successful heal check will prevent them from dying within the hour.
One of the things I really like about the weapons is that spears are very viable and more likely to cause Wounds, if you roll 6s on your attack. Too often in fantasy games, swords are the superior weapon. Furthermore, I like that missile weapons don’t have a range. It is rarely relevant in RPGs anyway and just an annoying thing to track.
In addition, weapons that are special or magical can influence many aspects of combat, and characters can perform additional actions based on their stance, certain virtues etc.
Councils Whenever the group tries to convince one or more important NPCs to aid them, the Loremaster can use the rules for councils. It works like a skill challenge or an extended test, where the characters have to gain a number of successes using different skills to convince for example Lord Elrond, a village council or the Shire Mayor to do what they want.
Journeys Travel is a huge part of Tolkien’s writing, and it is supported by rules for travel. When the group is on a journey, the players designate four roles between them: Guide, Hunter, Look-out and Scout (similar to the Forbidden Lands RPG).
The group decides on a path, and the game comes with a hex map of Eriador, where the different areas are colour coded depending on their difficulty, and a few places have additional dangers. When the group starts marching, their Travel skill determines how long they get before they encounter an event.
The maps for the game are beautiful and evocative!
The events aren’t combat encounters (they could be in Adventures in Middle-earth), but things like Ill Choices, Mishaps and Shortcuts that the group must face. The events are randomly determined and targets one of the four roles. Through narrative and a skill roll, the group determines how they overcome the event. Failure can result in fatigue, which counts as Load, and can make the characters Weary. With luck, the events can also be beneficial by meeting a potential friend on the road, for example.
The game also comes with a nice Journey Log, where players can record their journey’s and any sights they might see or people they meet.
This system does not prevent you from springing combat on your players or adding more complex locations or events to the journey. I think it has been designed to add story and mood to the game, while not preventing your characters from ultimately reaching their journey’s goal – they might be weakened by their fatigue when they get there, though.
The Fellowship & the Fellowship Phase
In keeping with the source material, the group of characters isn’t a group of self serving sell-swords or loot happy anti-heroes. They are a fellowship – a Company working together – and there are some mechanics to support that.
First of all, each character has Fellowship focus – another character whom he or she is has a special bond with – and when they aid that person with Hope, the character gains two dice instead of one. However, if the character is seriously injured or suffers a bout of madness the character who has a bond with them gains a point of Shadow.
Typically the Fellowship is supported by a Patron – a benevolent and experienced NPC who aids and guides the group. This could be one of the very well known characters from Middle-earth such as Bilbo, Gandalf or Elrond or one of the lesser known figures, such as Círdan the Shipwright or Gilraen (Aragorn’s mother).
The players normally decide which Patron they wish to have at the outset of the game. Each patron comes with a special ability the group gains and adds a bonus to the group’s Fellowship Rating. The Fellowship Rating is a pool of points the group has which they (most often) can use to regain Hope, but having Gandalf the Grey as Patron allows them to spend Fellowship points to make Shadow rolls favoured, for example.
Bilbo is a potential patron of the Fellowship.
In the Fellowship Phase – the down time period of the game – the players take more control of the narrative. They normally stay at their Safe Haven – such as Bree or Rivendell – and can then select a few actions (called Undertakings) they wish to do during this period. During the winter season (Yuletide) there are also some additional special options, as that period is typically several months, and allows the characters to go back to their families or kin, visit far off patrons and the like. Undertakings include Gather Rumours, Study Magic Item, Strengthen Fellowship and Write a Song (yes, songs have a mechanical effect!).
The Fellowship phase is also the time where Hope can be renewed Shadow scars can be healed – and it is the time that players can spend their hard earned XP!
If a character gets a reward from his culture – an grievous weapon, close fitting armor or the like – this is where the player narrates how they get it.
Lastly, the character can raise an heir. By spending XP and Treasure on raising an heir, the player can prepare a new character for when the current one dies or retires – a fun feature for a long campaign, and completely in keeping with the novels.
Adventures, Monsters, Magic & Lore
The game also comes with around 30 pages of information about Eriador, rules for generating magical treasure and Nameless Things from the dark, monster mechanics and 21 monster stat blocks and an example of a Landmark – an adventuring location with lore, NPCs, plot, treasure and monsters.
As is clear from the rules, the game is focused on adventures consisting of a number of scenes, potentially with a ‘dungeon style’ location. It is however not meant to be 4-6 encounters per adventuring day. I would expect to have combat in most sessions, but certainly not every session.
Lore & Landmarks
The lore in the book is a good foundation for gameplay briefly covering Bree-Land, the Shire (which is fully developed in the Starter Set), the Great East Road, the Green Way, the Barrow Downs and a few other locations.
It contains additional random tables for some of the locations and plenty of hooks for adventure. The tables include what you might find in a Troll Hole, what happens that night at the Prancing Pony or what you discover in an ancient ruin along the Green Way – could be a crumbling tower or a recently torched homestead? There are also NPCs for the characters to meet and problems that they need solved.
Looking at the original maps, they seem fairly empty of “civilization”, but in the lore and in the game, these regions contain many small villages and holdfasts, ruins of ancient keeps and so forth.
I like the tables, as they are a quick way to add the right flavour and a touch of something surprising to your game.
The Star of the Mist is a fully fleshed out adventuring location in the core rules. An additional book on Ruins was part of the kickstarter and in the works.
Adversaries Compared to many fantasy games, the list of monsters is shorter in Middle-earth, but there are several variations of trolls, orcs, undead and spiders the characters can face.
The rules governing monsters differ from characters, as they don’t have three different attributes, but only one, and they don’t have Hope but points of Hate or Resolve depending on the type of monster. These points can be used as additional dice, just like Hope, or to power special abilities – akin to Legendary Actions from D&D.
Personally, I wish the monsters had 2-3 abilities instead of the typical one to make combat a bit more interesting. The method for creating Nameless Things in the appendix actually contains quite a long list of abilities, which is good inspiration for mechanics to add to monsters.
The designers also left out several groups of monsters for future publications, such as Giant Spiders and Dragons.
I would also have liked stats for at least one very powerful creature, like a Ring Wraith or a dragon, to put things in perspective.
Magical items Characters are expected to find 1-3 magical treasures over the course of their adventures, but in The One Ring these items aren’t random – the characters are fated to find them.
In game terms, it means that the Loremaster is encouraged to draw up a list of 2-3 items for each character including names, a bit of lore and stats for each item. And when they find an appropriate treasure, the LM can pick one or more items from that list. This means that items are narratively bound to that character: they can’t be traded within the group and they will go with the character to her death, or into retirement (unless an heir has been raised).
A neat little feature is that you can spend an action in the Fellowship phase to unlock the next ability of the item, and if the player has spent valor in getting heirlooms from his culture, these “gifts” can be handed back, and in effect be “traded in” for upgrades to the wonderous artefact or magic weapon they recovered. It means the effort/xp spent earlier isn’t lost when they discover something better.
Final comments
I think The One Ring RPG 2nd edition is an excellent game fully focused on delivering the Middle-earth experience, enabling players to immerse themselves in Tolkien’s setting and have their own adventures meeting all the famous characters and foiling the plans of the Enemy. My imagination is certainly spurred.
The game is medium – towards light – crunch, and aims towards using rules to drive the narrative forward and make sure the game hits the right mood and atmosphere.
There are a lot of mechanics that I really like, and from my – very limited – experience the combat moved smoothly.
Reading the official forums, some fans of the 1st edition liked some aspects of the previous edition better. The previous edition had more mechanics for example for Councils and more uses for Hope. I can see that. As I understand it, in this edition, the designers have moved towards less rules for councils and more focus on letting the group narrate how it plays out. I think it is a matter of taste what you prefer.
If you have mostly played D&D 5th edition, I hope this article inspires you in your own game, and perhaps to pick up one of the many other great RPGs.
If you want to run a game with the same tone and mood as in Middle-earth, but in your own world with your homebrew evil overlord – whom the characters can actually defeat, instead of this other more important adventuring party! – I recommend the indie game Against the Darkmaster. It emulates the design of the old MERP/Rolemaster rules with more magic and crit tables, but with modern design. Funnily, also designed by Italians!
The One Ring 2nd Edition certainly touches the Middle-earth fan in me, and I hope to try it out as soon as I return to Copenhagen and my regular circle of gaming friends.
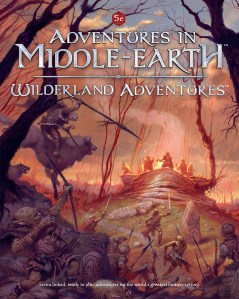
I’m running all seven Wilderland Adventures for Adventures in Middle-Earth with my group of 7 players and writing about the experience. You can also read reviews of other AiME products on this blog (and other D&D stuff). These adventure blog-posts are part review and part suggestions for Loremasters on how to run or adjust the adventure, based on my experience of running it. And to provide context for those two things, I will also describe what happened during our play-through of the adventure. Art is copyright Cubicle 7 and pulled from their material.
It took us four sessions of mostly great gaming to finish the sixth adventure in the Wilderland Adventures-series, so this is obviously a fairly long read. It is also the adventure with the longest page count in the book, with 25 versus mostly below 20 pages.
The adventure begins during the Gathering of the Five armies to celebrate the victory over the goblins following the death of Smaug. During the celebration all the soldiers of Dale, as well as many visiting dwarves, are poisoned which leaves the realm defenseless when the Gibbet King attacks with his army. The heroes have to rush off to defend the Crossing of the Celduin river, to buy enough time for King Bard to gather enough forces to stop the orcs. The longer the heroes can defend the small village next to the only bridge over Celduin, the less costly the victory over the orcs will be.
So far, it is probably adventure we’ve had the most fun with overall, but I did spend a little more time adjusting it. I also spent more time preparing props and minis and I made some terrain. It all factored in to make for some very memorable game sessions.
The mood is great, there are many opportunities for fun role-playing, the heroes can really build their legend, and it fits well with the heroes moving from Tier 1 to Tier 2, going from local to regional heroes. The final battle is difficult and epic – if adapted to fit your player’s characters and play style.
Mechanically, it works really well that there are no long rests available, until before the final encounter. However, I needed to do quite a bit of modification to make the last part of the adventure fit a more tactical game. The conversion from the One Ring RPG seems to fall short of actually adjusting the adventure to a D&D-reality.
The middle part of the adventure has a few problems, I think in large part because it presents itself to the players – at that point – as an investigation and intrigue adventure, but it is really not. The poisoning is just a plot point to force the characters to the main part of the story – defending the crossing of the Celduin.
How it played out
As mentioned, it took us four whole sessions of about 3½ hours to play the adventure with 5-7 players. We spent the entire first session just arriving in Dale, role-playing andd meeting NPCs and with the archery contest. The second took us through the middle part, and the third and fourth sessions were tactical combat in Celduin, with the final encounter taking up the entire last session.
Session 1: Baldor’s trouble and the Masked Ball
Baldor and Belgo have prominent roles to connect the characters to Dale, in my version of the adventure.
To have a real hook or two, I added two things (see the links to handouts below):
Baldor (from the first adventure) invited them to stay during the celebration, and he also had a personal favour to ask. Letter from Baldor
The hobbit emissary of the group was asked by the Mayor of Mikkel’s Delving to represent the Hobbits, as they didn’t know where Bilbo was, as they felt it was unseemly that the big folk should have that party without any hobbits being present. Letter to the Hobbit Emissary
The player’s seemed to really like those hooks and went readily to Dale. They arrived at Baldor’s new home. He had regained much of his wealth, but it wasn’t a happy house, and Belgo was in trouble and had started skulking from his tutor, stealing little things with his friends who were bad company. They waited up for him and he came home drunk (even though he was 12 years old). We had some great roleplaying with their ‘talk’ with him and the outcome was that he became a squire to the Dunedaín.
The two hobbits, one of them the emissary, went to Bard’s court and talked their way into being introduced to the court, where they met Bombur and others. Very evocative of the setting, and it used the backgrounds to good effect.
The next day I introduced all the suggested games and contests outlined in the adventure, and we had fun doing riddles, the dwarf Warden won the song contest, and rolled ridiculously at the party in the evening, so that really established him as a person of renown.
For the evening’s celebration I pulled in some additional characters to avoid having only NPC’s important to the plot at hand detailed (see link below). Also, I have many players, and each one needed someone they could engage with. I’m not running the Mirkwood Campaign after this, but I used a couple of characters from there, and they would work well for foreshadowing, if I did.
One of the hobbits spoke with Gandalf, so I had him invite them directly to his quarters instead of sending a note (which I also had prepared as a handout with the G rune).
The Dunedaín used his Foresight of their Kindred ability to see that there was something about a bridge and a storm in their future, and Lockman was a foreboding character (unfortunately, he kind of forgot that for the next session).
The following morning the contests began, and as I have a ranged-heavy group, most of them participated in the archery contest. The Dunedaín won with an incredible roll. He reached 35 on his to hit check. That obviously gained him much renown as well.
Session 2: Contests and the Feast
Dale is an interesting location, but not much information is currently available for Adventures in Middle-Earth. It can seem a bit of an abrupt shift in location from the previous adventures in the book.
The contest continued. The dwarf slayer won the wrestling contest (spending one rage) and lost in the finale in the riding contest. He also won much renown and was a favourite among the dwarves.
In the grand melee, the dwarf slayer participated with the woodman wanderer of the group, but no one else wished to participate. They made it through the two initial rounds and then it was a grudge match against the mighty Gerold the Beorning, whom the dwarf had defeated in the wrestling match.
We roll initiative every round in combat, and for this duel style combat that is especially important to add drama and avoid a slug fest. The dwarf slayer won initiative the first round and opened up with a reckless attack. To the player’s horror, Gerold followed up with three attacks and won the initiative the following round, which meant he had six attacks on the dwarf with advantage. Despite alone against two characters, Gerold manages to knock out the dwarf, but is beaten by the wanderer, who goes on to the finale to fight Elstan, first captain of Dale. They have an epic sword fight, but the player loses. Which I narrated as the best outcome, according to the crowd. The people of Dale saw a great fight, but their hero won at the end, so ultimately the Woodman also gained much renown for his effort against their great captain.
For the feast I had a large part of the group at the place of honour, which was great, as it puts them up front at the center of the action. The players of course began suspecting something was off, and the slayer tried to kind of intervene, but I just plowed on with “Lockman”, as that felt appropriate, because the jester would try and play his part and avoid being distracted by ‘the audience’. But I’m also railroading a bit, because I know that the poisoning needs to happen. I did not mention that the ale had an aftertaste, as suggested in the adventure, because my players would immediately catch that as ‘plot-slang’ for poison, and cancel the whole feast.
What has to happen happens, and everyone gets poisoned, and then the characters start looking for the responsible, they have the gates closed and ring the alarm bells, as they fear an imminent attack. They question the guards and hear about the group leaving with a chest, but they are long gone. They go to Lockman’s house etc.
So, this is where the adventure – I think – has the appearance of a classic investigation adventure. But it isn’t, and I think my players were confused, and probably feeling a bit useless, until I moved them on to the next thing.
We move quickly on to the consequences, and, as the dwarf Warden has the Ravens of the Mountain virtue, the raven comes to him with the message of the advancing army.
They go to meet King Bard the next morning, and as they did so well in the contests, and with an emissary among them, it seemed very fitting that he would look to them as heroes, and they didn’t need any prodding to help with a plan.
We then play the journey to Celduin. I forgot to put in Lockman as an option to pursue, but I actually think it is for the best (because I will use him in the final adventure). I added four goblin archers to the Raiders encounter for my five characters, and they easily defeated them in an ambush.
As seen before, the DC of perception tests are so low that the characters have no chance of failure. Of course, the designated Lookout has at least +0 to his perception, so there is zero chance the orcs will catch them by surprise…
They then reach Celduin, and has to treat with Erik, the town Master, which was great fun. They really didn’t like that guy. And we ended with them preparing for battle.
Session 3: The Battle Begins
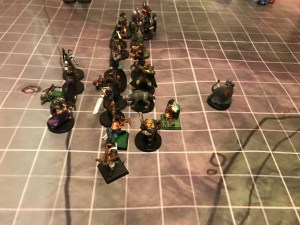
I spent quite some time building a tower terrain piece, as the verticality of the battle is quite important.
This session took us through part 7 of the adventure and the beginning of part 8. We run a tactical game, and I had wolf rider minis ready. The players made a plan, where two characters would hide on the far side of the bridge, to cut off the retreat of the outriders.
This sort of worked. One of the characters one the other side was the Slayer, who was now really feeling the fact that he had spent two rages and most of his Hit Dice recovering from the Grand Melee and the encounter with the orcs in the previous session (which was great!).
The outriders attack (I skipped the orc chief coming to threaten them to surrender, as my players open fire at maximum range), and they had a very tough fight, as they hadn’t planned for the wolf riders being able to jump into the river and get past the tower (taking some damage in the process from the submerged spikes, placed there by the characters).
I did add three goblin archers on wolves who stopped on the far side of the bridge, and an extra regular orc warrior on wolf to the encounter. But because I hadn’t expected the players to fight on both sides of the bridge, the extra wolves added quite a bit of difficulty to the encounter.
Ultimately, the players won a very hard-fought battle, and because none of the orcs or wolves escaped on the west side of the bridge, I allowed them to replenish the Preparation Dice they had spent.
Then the troll came, and with his movement they peppered him with arrows. He got to the gate and started smashing it. I rolled quite poorly, and they killed the troll when the portcullis had 4 hp left. With just a little luck, it doesn’t need many blows to crush the gate.
In the aftermath, the Warden sends his own raven out to look for the army, and we have a cool scene where it is the dwarf’s own raven that gets shot and speaks its last words to its master.
Finally, the Gibbet King speaks trough the dead warrior at the inn, but sadly few characters gain shadow points.
Session 4: The Final Battle
I made a Gibbet King out of two bases, some metal rods and an old 1990s Citadel skeleton. Unfortunately, I didn’t quite have time enough to finish it.
The final battle against 75 orcs and the Gibbet King took up the entire session. If you don’t run the encounter with minis you can probably shave some time off.
First, I should say, my six players managed to kill 40 orcs by the time they threw the Gibbet King into the river. And several of them had plenty of hit points left, I think. With the tower as a choke point, I think there is a chance they could have pulled off killing all 75. There are more on the far side of course, but that should still give the army pause…
Basically, I sent down dozens of orcs, who started climbing the tower using grappling hooks and just by climbing and who were shooting from across the bridge. I ruled that using a grappling hook it took two rounds to get to the top of the tower, but that it took three without them, as per the first encounter.
My group is fairly good at ranged attacks, and they stacked up a lot of kills in the about 5-6 rounds before I introduced the Gibbet King. They cut the ropes of the grappling hooks, and were ready to smite orcs that climbed independently.
The Gibbet King moved down to the gate, used his dread spells to first crush the portcullis and then to breach the repaired gate (that took two rounds, I ruled).
The hobbit emissary deployed his expensive fireworks, which blinded the archers behind them, and prevented more reinforcements from moving up for a couple of rounds.
Then the orcs streamed through the gate, but the dwarf slayer, and some of the other characters, plugged the hole, and could have held that for some time, while I brought up reinforcements.
In hindsight, if I had deployed more orc guards in the beginning, the orc killing would have been harder.
As all the characters I targeted with the Dread Spells had zero Shadow Points, the results were underwhelming (see my notes on changes below).
They shot some arrows at the Gibbet King, and could see they did damage, but ultimately, the Gondorian scholar began heroically to make his way to the King’s cart, and the Dunedaín followed (with a natural 20 athletics roll).
Together, and with a Gift Dice, they pushed the gibbet into the river, and the battle was over, with King Bard arriving to mop up.
Weirdly, they talked about preparing fire arrows before the battle, but never thought of using them against the Gibbet King.
How was the adventure?
We had a ton of fun playing the adventure. There are many great role-playing moments in the adventure, and there are opportunities for many characters to shine. It avoids having outside forces saving the characters, and there is a variety of final outcomes, depending on how well the player’s fare in the final battle, which I really like.
It is a perfect opportunity for the characters to move from being local heroes to gain renown as ‘tier two heroes’ (as per the Player’s Handbook pg 15), and show off their skills. My player’s enjoyed that a lot, it looked like.
I have previously, due to time constraints, not spent enough time tying the characters and their backstories into the adventures and the world, but when I did that effort for this adventure, it really paid off.
This is not an investigation… As I mentioned, the middle part suffers from being a plot device to ensure that the characters are the only ones who can go to Celduin and defend the bridge. Effectively, the characters are powerless to stop Lockman from succeeding in his plot, and they have little to do – which has any effect on the story – in the aftermath.
It looks like that the possibility of discovering the plot only serves for them to capture Lockman, but that has no effect on the story either , and he dies in his cell in the next adventure, which means it is basically a waste of time for the players.
I think it is quite poor design, but I recognize that it is hard to avoid, if you need the characters to go alone to Celduin and be heroes… I felt like I rushed through that part, in part because I knew it wasn’t the focus of the adventure, and I think my players felt that. On the other hand, you want to avoid getting bogged down in ‘investigation’ if there isn’t any point to it, as that I think would frustrate them more.
Fun encounters
The final three encounters are fun and dramatic. It can clearly develop in different ways, depending on fx whether the troll knocks down the gate.
It does shine through that the adventure was converted from a system that isn’t tactical. It is something that can be fixed, but I need to know things like, how many rounds of movement does it take for the orcs or the troll to get to the gate? And one of the Gibbet King’s abilities doesn’t even have a range to it.
To make it work tactically, and to get the right balance in the encounters, I did many small changes that I describe below.
All in all, 80% of the adventure is some of the most fun we’ve had with Wilderland Adventures.
What did I change:
I changed a lot of small things, particularly on the mechanical side. It is important to keep in mind that I had 5 and 6 players – respectively – for the last two sessions, so I had to increase the difficulty of the encounters.
Part 1-6:
As described in the overview of the adventure, I reintroduced Baldor and Belgo to get the group to Dale.
I added guests to the Masked Ball to avoid having only plot relevant NPCs there.
Lockman’s guards need some stats. I gave them 22 hp, AC 14, +4 on attack rolls and 1d8+2 in damage – but didn’t use them.
My players sent the villagers away for safety. Remember that some villagers need to stay behind, for example young women to treat the wounded, for some of the scenes to work.
The Battlefield:
Here you can see most of the battlefield.
An important change – that I didn’t ultimately need – was what the orcs would do, if the group manages to destroy the bridge. According to the adventure, the army will create a ford further up the river.
There is a number of problems with that:
First of all, that would take at least a day, thus pushing the timeline, but the characters only get two extra preparation dice.
Secondly, if they could actually do that, the tactically best move for an advancing army is to do that in the first place, instead of trying to take a river crossing held by the enemy.
Thirdly, if they actually cross there and arrive behind the characters, the characters are in a much, much weaker position, as the whole reason why they can hold against the army for a while. It would be a winning move, and the characters would basically be doomed.
The orc army wouldn’t even need to bother with Celduin, if they could cross elsewhere, but go north to fight the enemy army, invalidating the character’s presence.
The solution for me is that the orcs can’t cross anywhere else, but they can try to bridge the span with wooden logs or planks. There would in effect be a new encounter where the orcs and trolls try to repair the bridge, while being protected by archers and orcs with big shields.
I had the original map printed, but I didn’t like it for tactical movement on a grid, and it doesn’t match with the description of the bridge in the adventure. I therefore made my own. The bridge is described as being able to have two riders being able to cross at the same time. The original map has the bridge as 10 feet wide. That only leaves room for one horse. I therefore made the bridge 20 feet wide, also to avoid orcs getting completely bottle-necked.
I ruled that the enemy could move up to 300 feet from the gate, before being out in the open.
The Warg Riders:
My players placed wooden stakes in the river and on the river bank, which, on top of the preparation dice, damaged warg riders that jumped into the river to get around the tower.
I added three additional goblin archers on wolves that stopped on the far side of the bridge to provide covering fire for their allies, as it seemed like a logical choice, as too many warg riders would crowd the bridge.
The Troll
Because the troll must move for several combat rounds over open terrain, under fire, I gave it resistance against non-magical weapons.
The trolls ability to regain 3D6 hit points as an action is completely pointless if it takes more than 3D6 damage in a combat round, so I made that into a bonus action.
I added an actual gate with hit points, when the players decided to fix it before the battle. It would be weird, I think, if it only gave them a preparation dice.
The Gibbet King
I introduced the King after maybe six combat rounds. That was simply based on my sense of the battle, and when it was appropriate for him to arrive.
I gave the King speed 40. You could go down to 30, if that pacing is better for you.
The horses pulling the cart were undead, as that fit the mini I used, but you could also have orcs push it. With live horses, I think my players would have killed the horses, which would complicate things immensely for the Gibbet King…
The Gibbet King, has to – in a tactical game – drive all the way down to the gate. If the group has two good ranged focused characters, they can do quite a bit of damage over the rounds it takes him to get there. With just fair rolls, a Wanderer with Foe of the Enemy could without problem deal 10 points of actual damage per round. That could take The Gibbet King below half hit points, before he even reaches the gate.
I added 50% hit points, as there were six characters in the battle, and not the standard four.
According to the adventure, he makes the iron wheels of the portcullis move, but my players had already disabled the mechanism, so he naturally ripped open the portcullis, and after that the gate. That is also more dramatic, in my view.
Dreadful Spells:
The spell has no range. I gave it 100 ft.
As he needed to open two gates, and attack the characters, I didn’t adhere strictly to the recharge.
None of the characters I targeted had any shadow points. That makes it fairly disappointing. Consider adding a small amount of force damage, or necrotic damage, as an additional effect, For example 2d4 or 2d6.
Visions of Torment: again, my players had none or 1-3 shadow points. I increased the damage to 2d4.
I’m running all seven Wilderland Adventures for Adventures in Middle-Earth with my group of 7 players and writing about the experience. You can also read reviews of other AiME products on this blog (and other D&D stuff). These adventure blog-posts are part review and part suggestions for Loremasters on how to run or adjust the adventure, based on my experience of running it. And to provide context for those two things, I will also describe what happened during our play-through of the adventure. Art is copyright Cubicle 7 and pulled from their material.
A Darkness in the Marshes is the first of the adventures in the series that is tightly connected with the storyline of the main bad guy of the seven adventures – the Gibbet King.
I really like how Radagast is used in this adventure. I think the blessings he provides should have been used more in the Mirkwood campaign.
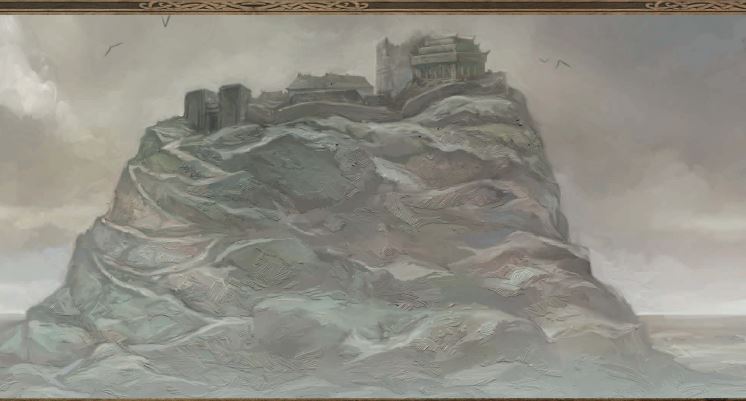
In the adventure, the characters are tasked by Radagast to find out what it is that stirs in the west. It is an information gathering mission – not search and destroy (to my player’s later frustration). He sends them to Mountain Hall, a woodmen settlement in the mountains, where the chief knows a lot. From Mountain Hall they can find their way to the old evil fortress Dwimmerhorn and learn something about the evil that threatens the area.
The adventure has a lot of atmosphere, and – as always – the style and mood of the adventure is closely aligned with original Tolkien canon. However, my run of it was not as successful as I had hoped and anticipated. The reasons lie partly with the adventure, partly with my players and partly with me.
On the one hand the adventures is good because the characters can fail to get to the key scene and the information at the end. The problem is, if they fail, the finale of the adventure will be unsatisfying, and you will miss the foreshadowing before the final adventure.
A second problem is mechanical, primarily with the chase system used if the characters are discovered. It didn’t seem to work – at least the way I understood it.
Thirdly, the fortress they have to investigate, appeals differently to more traditional D&D players. There are monsters to kill and human slaves they ought to rescue. Being unable to do those things doesn’t sit well with players who like being heroes, kicking down doors and slaying orcs.
To review the adventures, I intentionally keep fairly close to the adventure as written. For a better play experience, I could have customized it more to accommodate my player’s style.
How it played out:
The adventure took two sessions and a bit. For the first part I had six players and for the last part I only had four. All of them were 5th level.
The adventured started of really well. They meet Radagast and ask most of the questions anticipated in the adventure. They get their answers and are offered the blessing. My players declined a blessing, because they didn’t fear the more mundane dangers much, so they wanted to avoid being noticed by a greater danger.
In the adventure, the group is supposed to be guided by a local scout named Banna. I declined to use her, as my group already has a Wanderer, who has special knowledge of the area they travel in. I wanted him to shine, and the journeys are – so far – more than easy enough. And as far as I can tell, she has no real function in the adventure.
The Mountain Hall village has some threads to other plots and adventures you can use in a wider scoped campaign.
They arrive at mountain hall after a couple of unsuccessful journey events with an exhaustion level. As they have a woodman with them, it is fairly easy to gain access and they are led to Hartfast, the chief of the settlement.
The audience with him goes well. The dwarves offer assistance with his goblin problems and with the mining operation – as is noted in the adventure is an option, which is a nice touch – and the adventurers get descent lodgings.
The Dunedaín of the group discovers the goblin saboteurs and with a pretty astonishing amount of natural 20’s all the goblins are quickly killed, the missing guard is found, and the group are accepted as heroes.
The Dunedaín also use his foresight virtue to get a premonition that Magric the Trapper, who was offered as guide to Dwimmerhorn, is going to betray them.
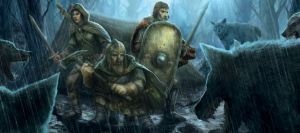
They see the Horn of Warning, meet Magric and move into the marsh. The escaped slave Walar comes running, and they have the encounter with orcs and wolves. I added a couple of wolves to the encounter to make it a bit more challenging.
As they are forewarned of Magric, they are ready for his treachery and quickly slays him. It is weird that there are no stats for him. He isn’t even given – as far as I can see – one of the standard profiles from the LM Guide.
After the encounter we finish the first sessions.
A dungeon! But not quite…
Dwimmerhorn is an adventuring location with a lot of atmosphere, but you might need a more fleshed out dungeon below.
The characters speak with the escaped slave, Walar, and learns a few things about Dwimmerhorn and they get a rough map of the place.
They decide to all sneak up via the hidden path. After a few failures, and some falling damage, they get to the top. From there they can see the temple and that orcs feed a prisoner to the wargs.
The group is kind of split between those who want to burn down a building and/or help the slaves escape and kill the leader of the orcs, and those who want to simply investigate.
They sneak forward to one of the storage rooms and wait to see what happens. I let Ghor the Despoiler walk from the ruined keep to the temple with a couple of hooded cultists (hoping they will follow). Instead they debate and decide to sneak into the ruined keep to look for information (which isn’t an unreasonable expectation), despite knowing there are human servants in there, but overlooks the risk of a fight that warns all the orcs.
In any case, they fail at sneaking undetected into the keep. When discovered, they again debate what to do: Continue to the keep and defend it and hope the tunnel to the dungeons is there, go to the temple instead and hope for a tunnel down to the dungeons below the fortress or simply escaping over the wall?
They decide to go into the keep. I place a handful of servants in there and they dispatch them and bar the door, while orcs surround the building. This gives them a couple of rounds to search, and as they find nothing, they decide to climb to the top of the ruined keep, jump down to the encircling wall and escape down the cliff, with a few extra arrows being short at them due to the route they took.
Fleeing from Dwimmerhorn we use the chase system in the book, which I can’t see works as intended. My group decides to use the forced march option back to Mountain Hall and they only get one journey event. As far as I can tell, that effectively means they can’t be caught by the orcs (more on this below), and they arrive at Mountain Hall.
As Magric was killed, there is no confrontation at the gate, as scripted in the adventure, and they are let into the settlement, where they can rest.
The adventure concludes with Ghor and some orcs sneaking into the settlement to assassinate them. I added two additional Snaga Trackers (against four characters), but they killed them all fairly easily. Partly, the reason for them handling this encounter easily is that their main melee character is dwarf slayer, which means he fights without armor and has advantage against poison, and both features are big advantages in this fight.
How was the adventure?
The adventure is pretty good overall, but our playthrough was far from optimal, for various reasons.
When you put a dungeon in front of my players they want to investigate it. As a game catering to D&D players looking for something different, I think there is a bit of misalignment of expectations between regular D&D players and the location as presented.
The chase system doesn’t work, in my view, and fails to bring a sense of danger and pursuit to the adventure. I wanted there to be a real chance that a character had to sacrifice himself to hold off the pursuers, as that would have been epic, but there was zero chance of that.
The missing dungeon I had recognized as a problem, but due to time constraints I didn’t add that to the adventure. I should have found a map online and had it with me (more on that below).
It is in the spirit of Middle-Earth, but the adventure sets the characters up to eventually be discovered, so they have to flee. The reason is that they want the evil mastermind to vacate the fortress, so the plot can go on. Not every player will enjoy that. It is a bit railroady.
We failed to get to the big pay off at the end. We will see how that affects the rest of the campaign.
The betrayer, Magric, seems kind of obvious, but it is in line with the world. He seems fair but feels foul. The adventure has him almost automatically escape. I let them kill him, particularly since the Dunedaín had used an inspiration on his Foresight of the Kindred virtue to foretell his betrayal.
If you’ve had a different experience, I would love to hear about it in the comments!
What would I change/do differently
Make a dungeon
I would definitely have a large dungeon map ready with some detailed locations and monsters for a regular dungeon crawl with pursuers behind them. Or I could have made a couple of events including some dark slimy monsters to meet below the fortress for a more cinematic approach.
When my players fled into the keep, I should have let the entrance to the dungeon be there and winged a couple of encounters and let them struggle all the way to a secret underground exit, after which they would have to sneak past sentries posted around the fortress to keep them from escaping.
The chase system needs to be reworked to a greater or lesser extent, unless you wish to avoid a greater risk of character sacrificing herself to slow the pursuers. At the minimum, the characters have to be caught unless they take some action to avoid it.
The chase system
I think it is quite important you add some actions the pursuing orcs take to catch up to the PC’s. It will make it more dramatic and prompt the players to take counter measures.
As written, the characters get a Lead of 2, if discovered inside the fortress. Each failed roll made to resolve the journey decreases the lead by 1. But, they only get 1D2 journey events. Already, the risk of capture is low. Unless, if I understand it correctly, they get a journey event that requires each character to roll, then the risk increases substantially.
However, if the characters attempt the force march option the lead increases by 2 for each of the two attempts – they don’t all have to make the constitution save.
On top of that, they can attempt to throw off pursuers by eg. Covering their trail. If they succeed they increase the lead, or decrease it, if they fail. If you forced march, the negative consequences outweigh the positives.
To correct it, you can increase the journey events to 1d2+1.
I would also add some proactive actions the orcs take to catch them, which I think would also spur the characters to take countermeasures. If you do that, you might keep the journey events at 1d2-
For example:
Wolf scouts are sent to harry them, and they are ambushed, with the wolves targeting any mounts or wounded they might have. It also decreases their lead by 1.
The orcs march through the night (effectively also use the forced march option to decrease lead by 2). The characters can hear the howls of the wolves growing closer.
The orcs blow horns which summons a patrol from another direction or a flock of crows to watch them.
I should have narrated the chase more, but I didn’t have much to attach it to. They had such a big mechanical lead that it was hard to make it sound dramatic.
Additionally…
I should have had Walar, the escaped slave, hint at that they are keeping something of great importance in the temple. Perhaps the coffin with it arrived and he saw it being brought into the temple? Had they known that they would have investigated it.
Ghor is CR 5, but a Great Orc is CR4. The main difference is that Ghor has about 20 more hit points and does a little more damage, but great orcs have a massive AC of 20. 5 more than Ghor with AC 15. I think Ghor needs more AC to last through a fight, and perhaps a second special ability to make things interesting.
The final encounter with Ghor was not as close nor as interesting as it could have been. It also has some mechanical silliness. The DC to hear the orcs, while sleeping, with passive perception, is 12. 12! Perception is probably the most common skill in any party. I had them roll with disadvantage instead against DC 15, but most still made it.
As mentioned, I added a couple of Snaga’s, and I boosted Ghor’s AC to 17. But the characters defended a house, and could keep the dwarf slayer in front as the main target, and he is very hard to kill.
Also, would they try to assassinate the characters, when they didn’t see the Chain of Thangorodrim or the Gibbet King?
All in all
I think this can be an epic adventure. It just wasn’t when we played it. The first part ran well with roleplaying that oozed atmosphere and Tolkien-vibes.
But half of my players for the second session wanted action and they wanted to be heroes by killing Ghor, rescuing slaves and perhaps setting the orc barracks on fire. It is a very typical D&D approach, and I’m often like that myself. They were fundamentally not in the mood for ‘information gathering’ and that happens. Sometimes you just want to kick in the door and roll initiative.
If I had added a chase through the dungeon, and spotted the flaws in the chase system, and corrected them, I think the session would have been more memorable (and it would expand the adventure to three sessions).
In a couple of days we move on to the Crossing of Celduin, which I hope will run more to my (and my player’s) expectations.
The previous three adventures are all reviewed on this blog. The first one is here.
I’m running all seven Wilderland Adventures with my group of 7 players. You can also read reviews of other AiME products on this blog (and other D&D stuff). These adventure blog-posts are part review and part suggestions for Loremasters on how to run or adjust the adventure, based on my experience of running it. And to provide context for those two things, I will also describe what happened during the adventure. Art is copyright Cubicle 7 and pulled from their material.
Those Who Tarry No Longer was one of the adventures I really loved when reading it. Unfortunately, it has some issues as an adventure when you run it.
The story involves the characters in protecting an elf noble lady who is going to the White Harbor and into the West. The characters are to deliver her to the High Pass, but unfortunately, the Big Bad Evil Guy wants to destroy her.
The adventure invokes a strong sense of Tolkien and captures the mood of the diminishing world very well.
But, the adventure is very railroaded. It depends on the players how big an issue the railroading is for the group.
My players have bought into the fact that we (more or less) run these seven adventures and nothing else, to reduce my prep time for a period and to check out Adventures in Middle-Earth. Despite that, a few of them were bored with how little actual agency they have on the adventure. Other players just enjoy the ride.
How it played out:
The adventure took 2½ sessions to play, partly because I had a large group for the two first sessions – 6 and 7 respectively.
Sometimes using anachronistic real world reference can be very helpful describing in game experiences. I would be pretty dumb struck meeting this guy…
I – rather ham-handedly – narrated how they had decided to hunt the white stag of Mirkwood, and during the hunt encounter Legolas escorting Lady Irimë. I had to spend some time describing the emotion she instilled to get the players to see, how their characters might react – despite knee jerk murder hobo reactions of scoffing at pansy elves. I both described her in Middle-Earth terms, but I also equated the meeting with how we might react, if we suddenly meet a global celebrity or politician, whom we might not agree with or who’s work we don’t care fork – Beyoncé or Obama for example. You may not care for them, but it would be impossible for most people to blow them off or make fun of them. That seemed to work.
We then had a fun time role-playing the mood of feasting with the elves and travelling with her – where she gives insight of the things long gone.
It works really well that they are travelling through areas the group passed by before in previous adventures. The way she provides new layers of understanding to the history of the Old Ford for example, gave the players a sense of all the things that were forgotten, which they didn’t learn from previous Lore rolls.
After the Old Ford they begin to encounter orcs, which led to the major fight on the hill top, where they are rescued by eagles and brought to an eyrie. The seven characters held off the orcs for eight rounds and with only one character down. Then I brought in the eagles, to not drag it on any longer.
A classic Tolkien scene. Too classic?
They laughed a bit at the cliché. But it is very thematic, and the meeting with the eagles afterwards I think was quite cool.
Session 2:
The second session of the adventure began with the players being dropped off by the eagles and settling in to the ruins of Haycombe. They camp and a caught in the dream world when Irimë fights the shadow that attacks her.
Initially, they liked the mystery of being transported to Haycombe and trying to figure out how to get home. We roleplayed in the inn and had fun, but when the master arrives and a fight breaks out, it quickly becomes clear that they have no real options. They can fight until they are forced to surrender, by the threat of burning down the inn. So, they surrendered.
We ended the second session after they had been marched to Dol Guldur.
Session 3:
The final part in the dungeons of Dol Guldur had fine role-playing opportunities, the mood was dark and the dwarves of the group had fun trying to fight their way out (I simply described how their attack ended up in severe beatings). The result was that when one was picked to fight the hill troll, it wasn’t the dwarf slayer – who might have had a chance – and instead it was the Dunedaín warrior, who was killed, and woke up – but I didn’t give him all the shadow points, as it was more a narrative death, to show them what was going on in the real world.
Their wanderer took the place of the boy in the next fight against the hill troll but was only beaten unconscious.
Finally, the shadow comes for the elf, all the characters make their saving throws, and they return to the world, with Irimë alive.
Elrond’s sons then arrive (and it was nice having the Rivendell Guide, to add extra flavor to that part), and Irimë made them Elf Friends.
The final scene of the adventure. It is cool, but I have a hard time imagining player’s, who have chosen to play Middle-Earth disavowing Irimë or going over to the Enemy, which the adventure is prepared for. The players want to be heroes.
How was the adventure?
It is a very railroaded adventure.
It is also an adventure with a great atmosphere, and there are some really good role-playing scenes in it. The core idea is strong, but the execution has several flaws, in my view. It seems like the author has a story to tell, and the point is to show the players the power and magic of the elves and give them a chance to experience Dol Guldur. It succeeds at that. I think there is a chance the author had something greater in mind but couldn’t fit it within the space he has in the book.
If your players simply want to experience and ‘live’ Middle-Earth and just want to help you tell this cool story, they will most likely enjoy this adventure.
If your players want to have real agency, they are probably not going to like this adventure, unless you change it – a lot.
I think a key issue is the fact that the players can’t see what their objective is, and the mechanical parameters aren’t visible. That means the choices they actually can make which have an impact on the final outcome aren’t clear, which means the players can’t make any meaningful choices (see game designer Sid Meyer’s view on that). They can of course roleplay their character – to some extent – but if their character would flee Haycombe at the first sign of trouble or they have a great plan to avoid being captured, they can’t really execute on it.
An example are the two big battles: the outcome is given for both and in the second case there is little penalty for death. But neither is there any advantage from holding out as long as possible. They might as well just surrender at the beginning, or you can narrate the whole encounter at the inn. It makes no difference.
There is not really any advantage in figuring out what is going on, either. And very little to ‘investigate’, which was my player’s initial approach. They just have to wait for the ride.
In Dol Guldur all their actions help decide the final DC of the saving throw they have to make. But the players don’t know that – although in my case I gave them enough information to their characters that they figured it was a spiritual battle about not giving in. As they did all the right things, the final DC was not hard. Is a single dice roll for each character the best way to resolve the climax? I’m not sure…
What could you change?
It would be a significant amount of work to make the adventure less railroaded. Below I have some ideas as to how players could get more agency within the current framework. I would love to get comments with other ideas.
In the battles against the goblins, I would have Irimë tell them that she will signal the eagles, and that they would have to hold out until they arrive. I would then progressively make each round significantly more difficult, using wolves, archers and perhaps a hill troll at the end. I would also wait with the star light from Irimë’s magical ring, until they came under big pressure. It might also grant them a HD in hit points. If the group fails to hold on for the given number of rounds (it says six in the book), Irimë would be killed, and the Eagles would come and take them all away.
Fights in inns should by fun and dynamic. I managed to make it relatively dynamic with foes breaking through the windows, but the group was well barricaded.
The fight at the inn is the biggest problem. I almost think the best solution is to simply narrate it and get on with the story.
You could give inspiration for lasting through both waves at the inn as a reward, but it is still very railroaded. Fighting to let others escape the town is another option, because that would feel like a victory of sorts, but then why would the key NPC’s not be among those who escape?
In Dol Guldur, the DC of the final roll changes depending on what their characters do. Do they tend the dying man? Do they convince the minstrel not to join the Necromancer?
To make a less railroaded version, I would keep the first part of the adventure, and the core idea for the dream and the spirits attack but make it into a (longer) more open adventure, with more freedom, requiring more investigation to figure out what is going on and more proactive means of defeating the spirit. But that is a significant amount of work.
All in all, the mood and role-playing in the adventure is great. But the players are mainly along for the ride. It depends a lot on your players if they would enjoy this.
Eaves of Mirkwood also contains pre-generated characters.
Eaves of Mirkwood is a combination-product for Cubicle 7’s Adventures in Middle-Earth. It contains a Loremaster’s Screen and an introductory adventure which contains brief versions of the rules unique to Adventures in Middle-Earth and some pre-generated characters. You can therefore play Eaves of Mirkwood without the Player’s Guide to Adventure’s in Middle Earth.
I’ve now run the Eaves of Mirkwood adventure and used the Loremaster’s Screen on several occasions (running Wilderland Adventures) and will below provide my point of view on the product, and give a little advice on running the adventure.
Overall, we enjoyed the adventure a lot. The Loremaster’s Screen is more of a mixed bag.
Odd product combination
Eaves of Mirkwood costs 20£ in Cubicle 7’s online store. I think that is a very reasonable price, comparable with the 15$ for a regular D&D screen. That said, I find the product composition weird. I don’t understand why you would package an introductory adventure, that is supposed to pull new players to the game, with a screen, which is something that Loremasters that play regularly needs?
I think the screen fits much better with the Road Goes Ever On product (a collection of inspiration, journey tables and other things, which you can read about here). I would have made the adventure and ‘light’ version of the rules freely available for download, to get more players, and thereby more revenue.
As a note, I can see the screen came with a Laketown sourcebook in the One Ring Game – the game Adventure’s in Middle-Earth was converted from.
The Screen
This is most of the illustration used on the screen (without the text box).
[EDIT: Below I have some critique of the screen, which Cubicle 7 really couldn’t do, so it isn’t quite fair. I would like info from the core game, but to print it on the screen, they also had to print the full OGL text on the screen itself, which is obviously unfeasible. I stand by most of the core points though. To make the ultimate most useful screen, you need to rework the screen a bit – or make your own.]
To me the core product is the screen itself. The cover art is a beautiful illustration of Laketown. If you look carefully, you can see the Lonely Mountain and the ribcage of Smaug sticking out of the water. It fits very well with the campaign that Cubicle 7 supports.
You could argue that a more generic illustration of typical Middle-Earth landscape, heroes and monsters would suit a broader spectrum of groups, who might play in different ages of Middle-Earth or different geographical locations. But it certainly looks good.
What is a good screen?
The core purpose of a screen is, in my view, to help the game master run the game more smoothly. Therefore, it needs the information you most commonly need to reference on it, or – like on my original D&D screen – assist your common improvisational tasks, such as deciding encounter distance, which happens often in regular D&D. So that is the curve I’m grading on.
To be fair, my regular D&D screen is also not perfect, in my view.
The screen has four panels.
1 is Starting Attitudes and Degeneration.
2 is Anguish, Blighted Lands, Misdeeds, Tainted Treasure and Page References.
3 are rule summaries for journeys, Audiences, Corruption and the page numbers for Fellowship phase undertakings.
4 are raw embarkation and arrival tables.
To me, it seems like the team at Cubicle 7 has stretched to use all their own tables, with not enough regard for what a Loremaster needs.
What do I use:
I use the Starting Attitudes in every session. It is a matrix with more than 100 results, so it is impossible to remember.
I could have used the journey rules summaries in the beginning of the campaign, but I remember the rules now.
Why aren’t I using the rest?
I run Wilderland Adventures, so I don’t need to invent my own journey events. Therefore, it is difficult to say if I would find the raw tables helpful? I think some Loremasters might find them quite helpful for improvising journeys. But I can’t say for sure.
All the information on misdeeds, degeneration, tainted treasure, blighted lands and shadow points seems misplaced to me. The misdeeds chart might be useful, if I didn’t run a published adventure, and I ran over a long period of time. The other overviews look so rarely used to me, that I would much rather want other information available.
The page references I don’t use, because I have a pretty good sense of where to find things in the books after having played 8 sessions.
Listing the page numbers for the eight Fellowship phase events seems particularly as weird filler, as the first page is already in the page overview and they only cover three pages in the book.
What am I missing
There are many Conditions in D&D and it can be hard to remember which one has which game effect.
Every time I use the Starting attitudes, I get annoyed that they didn’t also include the Final Audience Check DC chart, which is the reason why you need the culture matrix in the first place!
Secondly, I’m slightly annoyed they didn’t include an overview of the different Exhaustion levels. It is on my regular D&D screen, but it is a much more prevalent mechanic in Middle-Earth.
I would argue that most of the Conditions should be included.
In a thread in the Adventures in Middle-Earth Facebook group, I mentioned this fact. Jonny Hodgson from Cubicle 7 was very nice to answer that they weren’t included due to the space they eat up [EDIT: because of the OGL, which wasn’t clear in the post to me].
All in all, I’m fond of the art, but somewhat disappointed with the information presented on the screen.
The Adventure:
Snorri is one of the NPC’s the characters meet in Eaves of Mirkwood.
I ran Eaves of Mirkwood as part of a homebrew quest for one of my characters. I had three characters of levels 3 and 4, and I only had to make minor modifications to make it work.
It is fundamentally a very fun and thematic adventure, which a Loremaster could easily turn into an adventure lasting two or three sessions.
In short, the adventure is a journey through Mirkwood, where the characters encounter some dwarves fighting orcs. After the fight, the dwarves invites the characters to feast on roast pig. One of the dwarves took it from where it was tied in the woods. It turns out that a nearby village had tied it there in order to sacrifice it to a great warg. The villagers are pissed and capture the players, while they sleep after drinking too much beer. During their audience with the village chief the angry warg attacks with its orcs, and the characters have to defeat it.
How was the adventure?
We had a great time playing the adventure. The feast with the dwarves and the final battle are particularly well done. When the characters meet the dwarves there is an extended scene for the feast. It includes a smoking game (blowing different smoke rings), there is a riddle contest and the text of a dwarven song. The smoking game rules are worth a third of the product price on its own in my view!
The warg and the final battle is very well described, and the players thought the talking warg was a scary and cool bad guy. The battle is also quite hard.
Warning to new Loremasters
The Warg’s ‘Pack Tactics’ ability makes it even more dangerous accompanied by a minion or two.
The last encounter looks extremely volatile to me.
If you are new to the D&D system you should be aware, that the Warg is an incredibly tough opponent against a 1st level party for a number of reasons.
First of all, the warg’s attack does so much damage that almost any 1st level character is likely to go down from one hit. The average damage is 11, and only two of the six pre-generated characters can withstand more than one average damage hit. And, when a character goes down it can quickly turn into a death spiral.
The warg also has a fear aura, which the group’s melee types are likely to fail their saves against half the time, making the encounter more volatile.
Our setup of the final boss encounter.
The adventure advises that with more than four characters the Loremaster should add one orc per character. That makes the warg even more dangerous. Its pack tactic ability will ensure that with allies it is likely to hit around 75% of the time.
I added three orcs against my group of two 3rd level characters and one 4th level character, and it was still a tough encounter that could have gone both ways.
I love the fact that the encounter has a lot of tactical elements and that they get to roll saving throws. It makes it very dramatic. But I worry that the very cool boss is too ‘swingy’ an encounter.
One option is to have the dwarves participate in the fight and add an orc or two on top. The Warg attacks a dwarf first and wound him grievously and throw him to the ground. That way, the players see what they are up against, and you create drama by wounding or killing their allies – a classic game master trick.
I didn’t have time to include the dwarves. But with experienced players, you could have the players control the dwarves.
Expanding the adventure
If you plan to use this to play more than one session, or a longer session, you could expand the adventure a bit.
It would be natural for Eaves of Mirkwood to be the first part of the adventure. Instead of defeating the Warg, the characters manage to kill some orcs and drive it off. You could divide the action in the village into two – first they run down and face orcs that have climbed the palisades and then they have to run back and fight the warg, which is about to eat the village elder.
As a second part, you could have the characters go to get allies in order to defeat the warg and the orcs in their lair. This could be wood elves or woodmen in another village. That would require an audience and perhaps a small quest to demonstrate that they have the ability to lead such an expedition.
The third part would be the characters leading an expedition on a short journey to the warg lair – a ruin in Mirkwood or a series of caves – where they have to face the orcs, together with the three dwarves and the allies they’ve been able to muster.
That way the characters would be third level when they face the warg and its allies. A much less ‘swingy’ fight, and you get much more mileage out of a very cool big bad evil guy (wolf).
And if you want to homebrew after that, the warg could always be a lieutenant of something worse…
Final words
All in all, it is a solid product, and I’m glad I got to use the adventure. The adventure captures the mood of Middle-Earth perfectly and I’m confident newcomers to Adventures in Middle-Earth or newcomers to roleplaying-games will enjoy it. But I do think combining a screen with an intro adventure is a bit odd. The screen itself is useful, but not perfect.
If you’ve used the adventure as an introduction to people, who’ve never played with the D&D 5e rules or who’s never played and RPG before, I would love to hear from you on how that went? Was is accessible? Too complex? How did the final encounter go?
I’m running all seven Wilderland Adventures with my group of 7 players. You can also read reviews of other AiME products on this blog. These adventure blog-posts are part review and part suggestions for Loremasters on how to run or adjust the adventure, based on my experience of running it. And to provide context for those two things, I will also describe what happened during the adventure. Art is copyright Cubicle 7 and pulled from their material.
I had 4-5 players for this third adventure in the series.
If you want to run a longer campaign in Middle-Earth, I’ve written about this long campaign – which can be combined with Wilderland Adventures.
Kinstrife & dark tidings is an adventure with a darker mood and more focus on investigation, particularly compared to the second adventure. It has some action in the second half of the adventure. The adventure centres around a murder inside a family and the escape of the murderer – a young conflicted Beorning. Can the characters catch him, and can he redeem himself before Beorn’s judgement?
I think it was a good adventure, with a great atmosphere, but the second half didn’t play out quite as well as I had imagined. It partly depends on the group of course, our engagement on the day, my decisions, time left etc., but it is in the second half I would make a few modifications.
We played it over two and a half sessions. I would probably stretch it to three, and modify it a bit, if I were to run it again.
How it played out
Session 4 & 5:
Visiting Beorn’s home and the role-playing around it was probably my favourite part of the adventure.
We played the introduction to the adventure at the end of session 4. The characters stumble upon a boat with two dead Beorning warriors and discern that it would be the right thing to bring them back to Beorn’s house. They bring the bodies to Beorn and are relatively well received, they participate in the wake for the warriors, the Dunedaín of the group speaks of the ancient heroics of men, and the audience goes well. They are invited for the funeral and tasked with finding the murderer.
They find his tracks along the river, and the wanderer uses his special ability to gain almost magical insight, if he rolls high enough.
He rolls a 23 and I describe how he can see that the footsteps is of a man who has a heavy soul, a soul that weighs him down, and that worked very well. It was very Tolkinesque.
They encounter some travelling dwarves, fail a persuasion check, and learn little. Then they pass the Old Road and reaches a house where the murderer, whom they learn was named Oderic, stayed.
A day later they reach Stonyford, the village where Oderic came from, and they are grudgingly admitted. Here the warden employs his special ability to gain information, and they learn of Oderic’s fosterfather and his foster sister and the circumstances of the murder (as understood by the villagers). They manage to get into the angry foster fathers house and talk sense to him, and they get a good portion of the story from his foster-sister Brunhild, and learn that he was indeed there and took a boat to get across the river.
The group follows and tracks him to a small forest, finding clues and a dead merchant along the way. They find the bandit camp, which Oderic has joined, scout it, and understand that he is a ‘guest under guard’.
When he slips into the forest, and is followed by two guards, they attack the guards. They defeat them, Oderic bursts into the clearing, they invoke Brunhild’s name, he calms down, and that is where I ended the session.
Session 6:
I ran the final battle with minis, using the beautiful battle maps that comes with the adventure. I think that was a mistake.
We start the session with confronting Oderic and convincing him to return with the group. With some wrangling and rolling they manage to convince him that the bandits are evil and he reveals that they mean to attack the Beornings.
The group marches quickly to warn Beorn. They encounter a group of bandits on the way out of the woods. They get to the Old Ford, start warning the Beornings about the approaching bandits and get to Beorn’s house. Here they rest while Beorn gathers his troops. The next day they march to face Valter the Bloody and his bandits. The armies meet at the Old Ford, the group break through the shield wall and fights Valter, and slay him, when Beorn comes and finishes the fight. Afterwards they find the mummified head in his pack.
Finally, Oderic gets his sentence, and I thought that had a cool mood. The characters speak for him, and he is sentenced to paying a man’s worth to Brunhilde and afterwards he is to become a ward with one of Beorn’s men, to teach him better ways.
How was the adventure?
The mood was great. The interaction with Beorn worked really well, and the first part of the adventure had a very strong Tolkien atmosphere. The second part presented some challenges to me, partly because of the conversion to D&D 5e.
The investigative part is quite well done. There are multiple versions of what happened in the village, and the great thing is that there is no doubt that Oderic killed his foster-sisters husband (or is there?). Therefore, the players can deal with the motive, which in many ways is more interesting than ¨’who dun it’, and it never leads to a blind end. The success of the investigation is never in doubt, as it doesn’t rely on a dice roll or players asking the right question. That is good design.
Furthermore, both the Wanderer and the Warden really gets to show off their special abilities, such as Ever Watchful, which makes them shine, and I can tell the players enjoy.
I think tracking Oderic and the events along the way also works well and adds to the mood.
Valter the Bloody is actually a cool bad guy. But he doesn’t get much screen time.
When the characters encounter the bandit camp, which was around half-way, things become a little less smooth.
Scouting the camp and getting to Oderic worked ok. But I think there are a few ways I could have made the bandit camp more interesting. I think it is a shame, for example, that the villain, Valter the Bloody, isn’t set up to meet the characters. It can happen, depending on how extracting Oderic happens. It is worth considering not making him an easy target. If he stays within the camp, the characters will have to disguise themselves, or offer themselves up for service to get to him. That could lead to some interesting role-playing and let them understand Valter better.
A couple of weak points
The conclusion of the adventures has a few weaknesses, in my view.
Mainly, Oderic should get more ‘screen time’ before they get back to Beorn. There is a long description of his personality in the adventure, and the different aspects of his persona needs time and space to play out.
There is an option to force march back to Beorn to warn him, which makes sense, but there are no benefits in the adventure for doing so. There are no rewards for that risk (getting exhaustion levels), and it requires DC 15 con saves every day, so it is a gamble.
There is no set timeline with consequences, depending on their speed, and there is no discussion of what Valter does as a response to Oderic escaping/being kidnapped.
In my case the characters achieve the ‘normal outcome’ and has to fight Valter’s forces at the Old Ford, but in reality fighting at a river crossing is a massive disadvantage for the attackers as it restricts their movement.
The way to set up the battle on a grid with minis isn’t really supported either. There are no suggestions in the text on how to run it. It is clear that in the original adventure it is more a ‘story event’. I used minis in two long lines facing each other, where the characters had to break through, and it was ok, but a somewhat wasted opportunity to use the terrain to make it interesting and tactical.
Lastly, Beorn shows up as a bear. It is very thematic, but – and the players were quick to point this out – why didn’t he just show up sooner to decide the outcome of the battle and probably spare the lives of many of his men? I think the underlying premise is that Beorn never openly transforms into a bear, and that is fine, but why show up at the last minute?
What did I or would I change?
My changes were in the second half of the adventure, but in hindsight, I could have added things to Stonyford.
There are many rumours in Stonyford, which is a great help to the Loremaster.
The small village Stonyford has an old ruined watchtower. Because it is mentioned half the group went there. I should have made something for them to find. A small dungeon or something. That would have improved the pacing. They would have like a bit of action at this point.
When the group finds Oderic, I added that Oderic had heard Valter speak to some kind of unseen advisor in his tent. I think the mummified head is a bit too vague a clue, so I wanted to underscore that a bit. They’ve not connected the dots yet anyway, and I didn’t expect them to.
I would add more events and opportunity for interaction after Oderic joins the group. He has been built up by stories, but he needs more play time to display his faults and qualities to the characters. It could be that they meet Beornings at the Old Ford who wants to expense justice right away, or simply shames him – how does he react to that? A second combat encounter with his new allies can also reveal his character.
With five characters I also added a second bandit warrior to watch over Oderic, to make the encounter a little tougher. It worked well.
Make a timeline and consequences
I added degrees of success to the Forced March mechanic. Basically, in the final battle, the enemy would have surprise if they didn’t force march, the characters would have a surprise round if they succeeded with one day of forced march, and advantage for 1d4 rounds if they succeeded with two or three days of forced march.
I didn’t have enough time to do this, but I think you could develop more of a timeline with Valter’s actions, after Oderic’s disappearance, and combine that with the forced march rules. You could merge that with a timeline of how many warriors Beorn can gather in a day. The more days Beorn has, the stronger a force he can assemble, and getting the word to him early would become more meaningful.
I have paid to have the battle maps printed, but in the situation, I should have either: improvised my own map to manage the design of the terrain, or run the battle as a story. In my experience the story method works well, because the miniatures doesn’t really capture the chaos of battle well. That way you can also add bits of narrative events for each character in between.
All in all, it was a good adventure with a good atmosphere. But with a little effort the second half could be made more dramatic and interesting.
Last week I ran Eaves of Mirkwood combined with a home brew adventure for a side quest. Will write about it soon. Next time we will begin Those who tarry no longer, which I really look forward to.
I’m running all seven Wilderland Adventures with my group of 7 players. You can also read reviews of other AiME products on this blog. These adventure blog-posts are part review and part suggestions for Loremasters on how to run or adjust the adventure, based on my experience of running it. And to provide context for those two things, I will also describe what happened during the adventure. Art is copyright Cubicle 7 and pulled from their material.
If you are interested in running a longer campaign, fx to follow-up on Wilderland Adventures, this campaign is excellent, which I wrote about here: Mirkwood Review
Our second adventure had 5-6 players present for the two sessions. The group includes a dunedaìn warrior, a men of minas tirith scholar, a hobbit treasure hunter, a hobbit warrior, a woodman wanderer, a dwarf slayer and a dwarf warden (two cousins).
Of Leaves and Stewed Hobbits is a relatively light-hearted adventure which has a tone closer to the Hobbit than to the Lord of the Rings. The adventure is a rescue mission. A hobbit couple have opened the Easterly Inn, close to the Forest Gate of Mirkwood. The brother of the proprietor, Dindy, was sent back to the Shire, to purchase supplies, but his small caravan is running late. The characters are sent to get him, if he is in trouble.
How it played out
Session 3
We had completed the arrival to the Easternly Inn in session 2, had a Fellowship phase, and played through the hook of the adventure. That meant we were ready for the journey when we sat down for session 3.
The Easterly Inn is a nice warm inn with some fun NPC’s. A good place for a Sanctuary.
The journey itself was relatively uneventful. They got shelter from a thunderstorm, was blessed by a wandering Saruman and avoided a warg lair. They pass the Old Ford and go up to the foothills of the Misty Mountains.
The first scripted encounter was in the ruins of Haycombe, and old mannish town. When they spend the night, a shade captured the sleeping hobbit treasure hunter, but was then discovered by the dwarf warden on watch, and they defeated the shade. The caught hobbit found himself captured in the mud of a nearby riverbed, but wrestled free, and later found the treasure of the shade.
Up in the pass they come upon the caravan at an old ringfort. The caravan is beset by goblins and orcs, and they help defend it. They fight heroically, and only the scholar goes down in the final round of combat. At the end Dindy is kidnapped by the goblins and dragged off into the mountain.
Session 4
We begin the session by having a short rest, before pursuing the goblins into the caves. I do the goblin song, as best I can, and then they have a harrowing trip through the dark. They get a little lost, but avoid any serious encounters, before they find the goblin hideout.
They sneak up on the drunk guards, kill them, and find Dindy peeling potatoes. They help him out, kill the next guards, sneak down to the stored alcohol and spike the drinks of the goblins.
They get roaring drunk, and, disguised as goblins, the two hobbits steal the key to Dindy’s manacles, as well as the goblin chief’s silver mug. Then they rescue Dindy, and travel home to the Easterly Inn.
Note: As the goblin cave only took a couple of hours, we started on the next adventure during the session.
How was the adventure?
It was a very fun, dramatic and entertaining adventure. The mood is very close to the style of the Hobbit, and it seemed like my players enjoyed it a lot. They particularly noticed that the encounters are very well thought through and serve a purpose.
I think it is a well-paced adventure, with a natural climax in both parts of the adventure.
The defense of the caravan is classic Tolkien and is the first climax of the story. The second climax is the rescue of Dindy. You could argue that there is a difference in mood and tone between part one and two that might throw some people off a bit.
I used a napkin as a prop playing the drunk, pompous goblin chieftain. Great fun!
The wicked light-heartedness of the goblin caves was a point where I think the players really felt they were playing in Tolkien’s world.
The goblin song is quite clever, as it really sets the tone for the second part of the adventure, because it is different from the serious battle defending the caravan. Dindy and the goblins were very fun to role-play, and all in all, we had a great time.
The total play time was probably around 6 hours. So, a little under two whole sessions.
My biggest disappointment was that the ringfort wasn’t among the colour maps for the adventure. I don’t understand why it wasn’t included, as it is such a tactical encounter.
The goblin cave worked well overall. The treasure hunter was puzzled, though, when I told him he was unable to pick the lock on the chains. Dindy has obviously been placed at the entrance of the cave for the setup of the adventure to work smoothly, even if it isn’t entirely logical. I could have let him roll, but if he rolled a natural 20, it would also have been disappointing when he still would fail.
Running the adventure
What did I change, or should I have changed?
Not much.
I used the Rhovanion Region Guide to flesh out the stop at the Old Ford. That gave a bit of colour.
The battle at the ringfort was the only place, where I had to revise things on the fly. The One Ring, which was the original system, is more story focused, compared to D&D, and my D&D players, who are more tactical, needed a slightly different approach.
Defense against overwhelming numbers is classic Tolkien.
My player’s expect more information to defend their position in the best way possible. They expect an number of opponents and an exact range they could begin firing at , to reduce their hit points as much as possible. That is very reasonable, as several players have made ‘ranged builds’, and it would be unfair to them, not to let them gain an advantage from that focus, to reduce the danger of the encounter. But the encounter isn’t built for that, so I added a couple of orcs for balance.
I had also given the dunedaìn player a premonition of this battle (due to the Foresight of Kindred virtue), and he guessed that goblins would be coming from the side. Even without hints, your players might plan for guarding the flanks. But in the adventure the goblins just suddenly appear. The character on guard did perception checks to spot them, and I had to add how many rounds they would need to climb the hillside (3 I think it was), and I added an extra goblin, as I expected a couple to die on the way up.
The adventure says that the leader attacks after the first orc soldier goes down. But that is too soon. The orcs had a hard time getting past the entry point, so the leader and a couple of extra orcs came when most of the first wave was gone.
I had planned on having the players run the NPCs against a smaller group of orcs, but time was against me, and I discarded that idea. I do think it would have made the battle even more interesting, as they characters might have needed to reinforce a failing second front. It also often creates a closer connection to the NPCs if the player’s have run them in combat.
Tricky Night-Wight encounter
The encounter with the Night-Wight could be tricky for smaller groups. There is a risk of a TPK. The shade has about 50% chance to sneak in and kidnap characters. With four players there is a real chance that it will get two or even three players. If one or two characters face this shade at level 2, they could easily get killed, before the other characters awake and break free.
With six players it wasn’t a big risk for me. But watch out, if you have a small group!
Random events/encounters
The journey events worked well (again). I really love that system.
They also added six potential random events for the journey under the mountain, and I didn’t need any of them, when I followed the adventure.
In hindsight, I should have used one or two.
There were two challenges though: the characters were already under a lot of pressure (they only got a short rest at the ringfort) and the journey itself caused 1 exhaustion level for the two scouts of the group.
Furthermore, the events are quite dangerous and damaging.
I should have reduced the consequences of the encounters, and had them run into a couple.
All in all, a very entertaining adventure, and I can’t wait to run the next session tomorrow!
Adventures in Middle-Earth is made by Cubicle 7, and a conversion to D&D 5e. from The One Ring RPG. You can read my review of the core book here.
The Mirkwood Campaign is a campaign framework for an Adventures in Middle-Earth campaign, set in and around Mirkwood. The campaign evolves over 30 years and contains one or two adventures – or at least an adventure framework – for every year, which takes the players from 5th to around 15th level.
I think it is a very strong campaign framework, with a grand narrative scope and an epic ending. But the format is also unlike any published campaign I’ve read, which is why this review is more than just evaluating if it is good or bad.
The purpose of the review
I think the most important thing I can do for other Loremasters, who consider buying this campaign, is to do some expectation management.
My job is to make you – the reader – able to judge whether this campaign is something you and your players would like playing? That is not easy, as there are many variables, and this is not a standard campaign format.
The approach Cubicle 7 has picked to present the campaign and the philosophy behind it might surprise or disappoint Loremasters, if they expect something else.
Perhaps an easy first step is to tell you what the Mirkwood Campaign is NOT?
It is not a Sand Box campaign with a selection of locations and NPC’s with motivations that will influence the game.
It is not a series of fully fleshed out adventures, like Wilderland Adventures or classic campaigns like the Enemy Within (classic Warhammer Fantasy Roleplay).
Spoiler Alert! If you are a player, you should consider not reading any further.
What is the campaign about?
There are also rules for player Holdings in the campaign – a farm, inn or other permanent residence where the characters live. It fits nicely with the long years of the campaign.
The campaign takes place in and around Mirkwood, and the outcome of the campaign decides if the Woodmen of Mirkwood and the Beornings are able to withstand the Shadow during the War of the Ring, decades after the campaign concludes. The three Nazgûl that moves into Dol Guldur are the main antagonists, with the Werewolf of Mirkwood as a primary lieutenant. The struggle over the Lamp of Balthi in Woodmen Town is also central to the campaign.
During the campaign the players will be instrumental in countering the influence and machinations of the Nazgûl. That is cool. I think the overall scope of the campaign will be immensely satisfying for any players interested in the Middle-Earth setting.
It is however recommended that at least one character is a woodman, and that is important advice. The characters need to care – or have been made to care through level 1-5 – about the place and the people living there. Otherwise, many of the adventuring hooks won’t feel that important. That said, there are also good hooks for dwarves and wood elves through the campaign.
What kind of product is it?
Structurally, the campaign book is divided into five periods, of 5-10 years. For each year in a period there is an overview of important Events that happens that year, an Adventure that is central to the main story, and a Year’s End, which describes the general outcome of the year.
The campaign begins around level 5, so you either need to make your own adventures up to that point or run some or all of Wilderland Adventures to get the players to the required level.
The Events for each year are a source for potential adventures, but the described Adventure is one that drives the epic story arc forward.
The adventures vary in scope, detail and quality. As a Loremaster, you are expected to do quite a bit of work yourself. Most of the adventures are not ‘ready to run’. There are no maps of key adventuring locations, such as Tyrant’s Hill, and it is up to the Loremaster to weave the adventures into a cohesive campaign, with hooks and motivations that align with this epic narrative.
Varying detail level
Is the guy with the orc heads a good ally?
As an example of one of the less impressive adventures is The Folk-moot at Rhosgobel. It is one of the first adventures, where the Woodmen will make some very important political decisions that will influence the rest of the campaign.
There are several NPC’s at Rhosgobel, some of them detailed in the Rhovanion Region Guide, but there is nothing on how they stand on each position, or any indication of how they might want to influence the characters. There is also no hook as to why the players are there. And – more importantly – no hook as to why they should get involved or care about the decisions being made. Because the players don’t know that the decisions made at the end of this adventure will matter in the rest of the campaign, you should consider at the beginning of the campaign, why this moot should matter to them?
On the ‘bare bones’ side is an adventure, where the characters get involved in reclaiming a dwarven stronghold. The books lays out the plot, but you have to make the dungeon and any adversaries yourself.
A fleshed out example is one of the last adventures called Nine in the Hall, which is basically a horror adventure ready to run. It is – by the way – very cool that you can run a horror style adventure at around 13th level. That is virtually impossible in regular D&D, given all the magic available to the characters.
Nice long term view
The author, Gareth Ryder-Hanrahan, generally does a good job of presenting the effects on the campaign of different outcomes of adventures. For example, if the characters fail or if they support one, or another, NPC in an undertaking, how does that affect the coming years and the campaign.
Are the adventures good?
Most are good – or work with a strong core idea. There are several adventures in the book that I find great, very dramatic and interesting, such as Saving the Maiden, where the adventures have to journey to the Parliament of Spiders and negotiate with two of Shelob’s Children and then go and confront the third child of Shelob, Tyluqin, in her lair. Or when the characters -unexpectedly, face a Nazgûl the first time. And, as mentioned, one of the two final adventures, fits perfectly with the Middle-Earth mood.
A few of the adventures feel a bit underdeveloped, even for frameworks, and a few feels too railroaded for my taste, or have assumptions built into them that are odd.
Odd or underdeveloped
If this concealed the entrance to a larger interesting dungeon, it would be more interesting.
For example, in the adventure, Questing Beast, the players come upon two dwarves, who have kidnapped an important elf. Never mind that this is sort of random (fate I guess) as part of the hunt of the White Deer, but the fact that the location they are holding the elf is just a hollow tree, seems underwhelming to me. There are obviously plenty of ruins in Middle-Earth (just check out the Road Goes Ever On supplement), so why not make this into something interesting? An elven ruin with some secrets and maybe a monster lurking somewhere?
An example of odd assumptions is, when the Werewolf of Mirkwood begins attacking the wood elves, the adventurers track it to its lair, and find the remains of a legendary elven lamp (although they probably don’t realise this at the time). The adventure assumes that the players describe the lamp to the elves, and maybe figure out what it is, but my players would with 99% certainty bring the remains of the lamp with them. They also might try to restore it or investigate it further. But that isn’t at all considered in the adventure.
Probably the poorest example, in my view, is when the Forest Dragon wakes up. I was quite disappointed with that adventure. There has been no effort made into making facing a dragon in Middle-Earth feel epic or interesting. It is just a ‘hunt this monster’ story, and the dragon doesn’t do anything interesting, the Enemy isn’t doing anything interesting with it, and it doesn’t have a cool lair or any interesting abilities.
Is the campaign good?
Yes. Very good. Excellent even. I think. No, I’m sure it is. But there are a few clunky parts that I think could frustrate me.
I think there should have been more advice, particularly for new or less experienced game masters, on how to weave this framework into a campaign. A page or two of with an example would be useful.
The finale of the campaign is fantastic, and the fact that there are two different adventures to end the campaign, depending on how the characters decide to defend against the Shadow is very cool. Option 2 needs some work to have an epic finale, but the overall idea is good.
As I mentioned, as a whole, I think player’s would find the grand tale very very satisfying, if the ending is done right.
In general, the campaign does a good job of allowing failures as an outcome of an adventure – and that the failures impact the outcome of the campaign. You are given suggestions how to adjust most adventures depending on whether, for example the Woodmen are allies with Tyrant’s Hill or whether a particular ruler is still alive. That is great.
What are my main critique points?
There are instances where it feels railroaded. For example, where someone escapes, or something automatically happens, because that development or person is important to a future story. In a story driven game like this, you can have it happen ‘off screen’ as the ‘appendix’ to the story, and my players would be fine with it. But if it is part of the action, it is dissatisfying.
I also miss a flow-chart or graphic presentation of all the different adventures, with key decision points and a discussion of progression/leveling through the campaign.
Too much NPC Wizards
I think the Wizards are overused as participants in the adventures. They are to join the group in four adventures and show up in others. I think including them in two of the adventures, makes sense. I rarely enjoy having powerful NPCs participating in an adventure. If an immortal wizard of vast power is leading a group of 7-8th level characters, they will defer to him. And because it is Middle-Earth, the players will know exactly how powerful that NPC is. Scouting Dol Guldur as 6th level sounds much more interesting, if they alone. The solution in Wilderland Adventures, where Radagast is a patron that confers a useful blessing for a mission is much better. I would use that more.
Uninspiring locations
Too many locations are not very inspiring to me, as I mentioned. Perhaps it is the difference in play style from the One Ring, which the campaign originally was developed for, to Adventures in Middle-Earth, where I still think you need a measure of old-fashioned dungeon exploration.
It may be also be the play-style difference when it comes to the maps. There are no local maps of dungeons, locations or the like, which I’m going to need. I would have liked some.
Conversion problems
Fighting a Nazgûl and the Werewolf is a very cool encounter, and it happens, but I think the stats don’t match their fear factor.
The game mechanics, and particularly combat mechanics, of D&D seems to be a weak point for the people at Cubicle 7. It is as if they haven’t run a mid-to-high level game for players who care about the mechanics.
If you are an experience Dungeon Master, these things will be relatively obvious, but for newer players it may not, and that could lead to disappointing/less dramatic moments.
One example is the Werewolf of Mirkwood. It is Challenge Rating 6, according to the Loremaster’s guide. The players will face it at around 6th level, at 10th level and again at 12th or 13th level, where they with the Lamp of Balthi have advantage on all attacks and their foe disadvantage. That they haven’t added significant amounts of minions or lieutenants is odd. There isn’t even a text box addressing this is baffling to me.
The Dragon of Mirkwood has the same problem. It is CR 12, and they are to face it at level 12. As any DM, who has run a significant amount of games will know, a single foe, with two attacks versus a group of characters, with probably six or seven attacks between them is not going to last beyond round three.
Finally, the Nazgûl are weaker now, compared to the time of the War of the Ring, but I still think they are on the weak side. And they don’t have enough tricks. They don’t even have Legendary Actions or Legendary Resistance. That is a weird design choice to me…
Silly difficulty
On the other hand, in one of the later adventures, the characters suddenly face wisdom saving throws of DC 20, which even proficient characters will fail half the time, and those who aren’t proficient will almost surely fail. Or when on a trip with Beorn, characters have to pass two out of three DC 15 constitution saves. If they don’t they can’t continue in the adventure. I guess they have to sit and watch or go home for the rest of the evening?
Not exactly an epic foe for a 13th level character…
Finally, the consistent use of the standard NPCs from the Loremaster’s Guide becomes silly. At 12th or 13th level, the characters are supposed to deal with a band of outlaws, numbering between twice and four times the number of characters. According to the adventure, they can ‘get allies to besiege the tower’. But Outlaws have 33 hit points, AC 15 and +3 to their attack rolls. How is that going to challenge four 12th level characters – even in the Middle-Earth system? If they were to really score top marks, they should have added descriptions of a couple of tough lieutenants that you could add to the mix.
It can seem like it is simply lack of effort in converting an otherwise excellent campaign.
Final Words
The Loremaster gets a huge helping hand to run this campaign, but she will have to make a significant effort herself to weave the character’s tale into this grand narrative and flesh out the weaker points (and drawing maps). The Mirkwood Campaign will be an epic and memorable tale for every player who is along for the journey, I’m sure.
I hope I will find time to run it within a couple of years.
Agree? Disagree? Have you run it? Please, let me know in the comments!
I’m running all seven Wilderland Adventures with my group of 7 players. You can also read reviews of other AiME products on this blog. These adventure blog-posts are one part review and one part suggestions for Loremasters on how to run or adjust the adventure, based on my experience of running it. And to provide context for those two things, I will also describe what happened during the adventure.
Our first adventure had a somewhat fragmented group. We began late December, and due to vacations, illness and work, I had 3-4 players when running the adventure, but in different constellations, so I had to do some narrative adjustments to keep it logical.
How it played out
Session 0.5:
The first four players made their characters, and we began the adventure. I followed the adventure and had them wander along Long Lake, when the young Belgo comes running, and tells them that his father is being attacked by his guards. The group rush after to help him and drive off the thugs with a well-aimed attack and a solid intimidate roll. They agree on helping him getting through Mirkwood, travel with his elven friends on rafts to the Halls of Thranduril and manage to convince the elves that they can stay and get some nice supplies, while they rest. They still feel that they are rather an unfriendly lot, those elves.
A book of 7 linked adventures for Adventures in Middle-Earth by Cubicle 7.
Session 1:
The group begins the journey through Mirkwood with the merchant Baldor and his son Brego. With two of the original four players missing, and two new players participating, and one still not able to make it, I create an encounter, where the two new characters are fighting two attercops, and the third – still unnamed character – has been poisoned and is unconscious. The two ‘old’ characters come upon the battle, while leading the small caravan, and throw themselves into the fight. During the fight, the non-present characters ‘guard’ the ponies, Baldor and Brego against other attercops. The two groups agree to travel together for safety (obviously).
For the journey we rolled Feast for Kings for Embarkation and two journey events. I decided to place the journey events in between the fixed encounters, and they arrive at the sink holes, a place touched by the shadow, before the Castle of the Spiders.
Baldor drinks from the stream, and the present characters chase after him, while the non-present two characters remain behind to guard Brego (felt fitting with the story, actually).
They follow his trail and arrive at the castle of the spiders, where they successfully rescue him, after a tense and fun battle. I had one of the absent PC’s arrive, a world weary Dunedaín, to provide bow cover-fire for their escape.
After the battle, Baldor and a dwarf player character have a great role-playing exchange on Baldor’s experience of the death of Smaug and the reclaiming of the Lonely Mountain.
I introduce the second journey event, and the group comes across Tauler, one of Shelob’s children, but they manage to avoid him without being seen, but gain a few shadow points, and run for their lives.
Session 2:
The unconscious (7th) characters wakes up, but due to unusually low attendance, he only has two active travel companions. I narrate how the absent characters are so exhausted and mentally drained from the trip, that they stay around the Baldor and Bregor to guard them. The new character is a Wanderer, and as the group really needs a long rest, he activates an ability, to lead them to a hideout, where they can have a long rest.
After the rest, I introduce an additional journey event, where they find warg paw prints at a potential camp site, and the wanderer shines again. Then comes the storm, they fail their audience with the hermit, and a thrown out of his home.
Finally, they arrive at the well, the Dunedaín fails his save, and jumps into the well. They fight the Thing in the Well and survive.
As we still have good time left, Baldor tells them of the rumour of the new Easterly Inn. They head for that location, we role-play the arrival, have a fellow-ship phase, and I introduce the hook to the next adventure. We end the session when they depart to find Dindoas Brandybuck.
How was the adventure?
It was a strong adventure, and it played better than I had expected. After reading all seven adventures, I considered this the weakest of them all. But it was dramatic, had a strong mood and reflected the dangers of this journey well.
My players have had different play experiences, because of the fragmented group. But, overall, they are happy that there is action, but a greater focus on role-playing than in my home brew campaign. A couple of them did fear that the setting was too – how shall I say it – light and too focused on pure narrative role-playing drama. They want to roll initiative and fight orcs. And they still get that!
One of my players also told me that he really liked that he knew that everyone is a hero. In regular D&D, he must consider everyone’s true motives, but in AiME, they can fundamentally rely on each other.
Dark mood
The mood inside Mirkwood was excellent. The journey events enhanced the mood really well. In the second session I did change one of the random events from an encounter with more attercops to the ‘place of shadow’, because they were fighting attercops when I introduced the new characters. For pacing reasons, I had four journey events (including the attercop attack in session 1), and it worked well.
The oppressive and exhausted mood that is the essence of the journey played out very well. Particularly, after the group rescued Baldor, and he told his story of losing his wife and home, wishing the dwarves had never woken Smaug, we had one of the best role-playing scenes in recent years. The frayed bond between father and son also gave the last part of the adventure a shadow of sadness, which I think worked well.
I’ve had the battle maps printed. It adds an extra dimension, for sure.
Good & bad encounters
The Castle of Spiders was an awesome encounter. It was very tactical, because of the terrain. It was tense due to constantly appearing spiders, and it looked like the players had a great time. The small things, like 25 ft. movement, and wielding a spear with reach, was important.
The Thing in the Well was not quite as interesting a battle. I had to boost its hit points, despite there only being three characters, as they had reduced it to half hit points, before it had a chance to act.
At first level there is a lot of luck involved in combat, and one blow can fell a character. So, on one hand, the encounter is very dangerous. Characters falling down the well, or who are hit more than once, have a good chance of going down, and that will quickly turn the tide. Particularly, if they have spent their powers already, they will be in great danger. On the other hand, the Thing has AC 12. With starting characters having +5 or +6 on hit rolls, it means it is likely that 3 out of 4 attacks will hit it the first round. Three attacks can quite easily do 20+ damage. As written, it is unlikely the combat will last more than 2 rounds.
As I considered the Thing a bit of a boss encounter, it was a little bit disappointing.
What would I do differently?
I would change the hook:
You can listen to Matt Colevilles arguments for starting in a tavern, here.
The hook is rather weak. I understand they want to introduce the action quickly, but if I were to run it again, I would start the adventure in Lake Town at a tavern. I would let the thugs be competitors to the characters, which would create tension in the first scene. It would also give the characters a way to introduce themselves, the can haggle with Baldor, and intimidate the thugs. Later on, the thugs can follow them, and try to attack them at night.
I would introduce scenes:
When Baldor drinks of the enchanted stream and runs off, it is one of several cases, where something happens during the Wilderland Adventures, where it seems like the characters can act, but the outcome is basically certain, if you want a fun adventure.
The problem is that the characters think they can catch Baldor, before he runs into the forest, for example with a skill roll. I mean, Baldor is an older, not very fit man. It seems plausible, but there is no indication of how far Baldor is from the watch, when he goes crazy. That can create frustration with players. My player just shrugged it off.
The same can basically happen, if Brego is the one enchanted by the Thing in the Well, and throws himself into the well, and a similar situation occurs in the next part of the adventure.
The solution is to me – suggested by a player, who also DMs – that I tell them there is a scene, and I then describe what happens in a dramatic way. They are cool with a fun story unfolding, and that way there is no ambiguity to create frustration.
I would change the final encounter:
I think the final encounter could use some more terrain to make it more interesting. If the well is inside some kind of ancient structure, just with some walls and perhaps a couple of rooms, it would create more tension when they explore it.